favorite raspberry swirl lemon pound cake

what’s better than raspberry and lemon to kick off summer, right? you’re probably thinking vacation, duh! okay, there’s nothing that can beat vacation, but what about a raspberry swirl lemon pound cake over memorial day weekend? you are combining vacation with the most summery flavors i know. now we’re talking.

i absolutely LOVE pound cake and it reminds me of my childhood every time i see it or eat one, two or three pieces. i grew up eating pound cake or “ponqué” as white cake. i don’t think there’s such a thing in venezuela. all cakes are pound cake and that’s why i’m crazy about them. i shall confess that pound cake is the only pastry i eat at starbucks …in case you’re wondering for some strange reason, haha.

speaking of which, this cake totally reminds me of the lemon pound cake from starbucks. yes, yes, yes, you read that right. this recipe has cream cheese, melted butter, real lemon zest and real raspberries. the difference between using softened butter vs. melted butter is huge. melted butter leads to a softer, moist and denser cake.

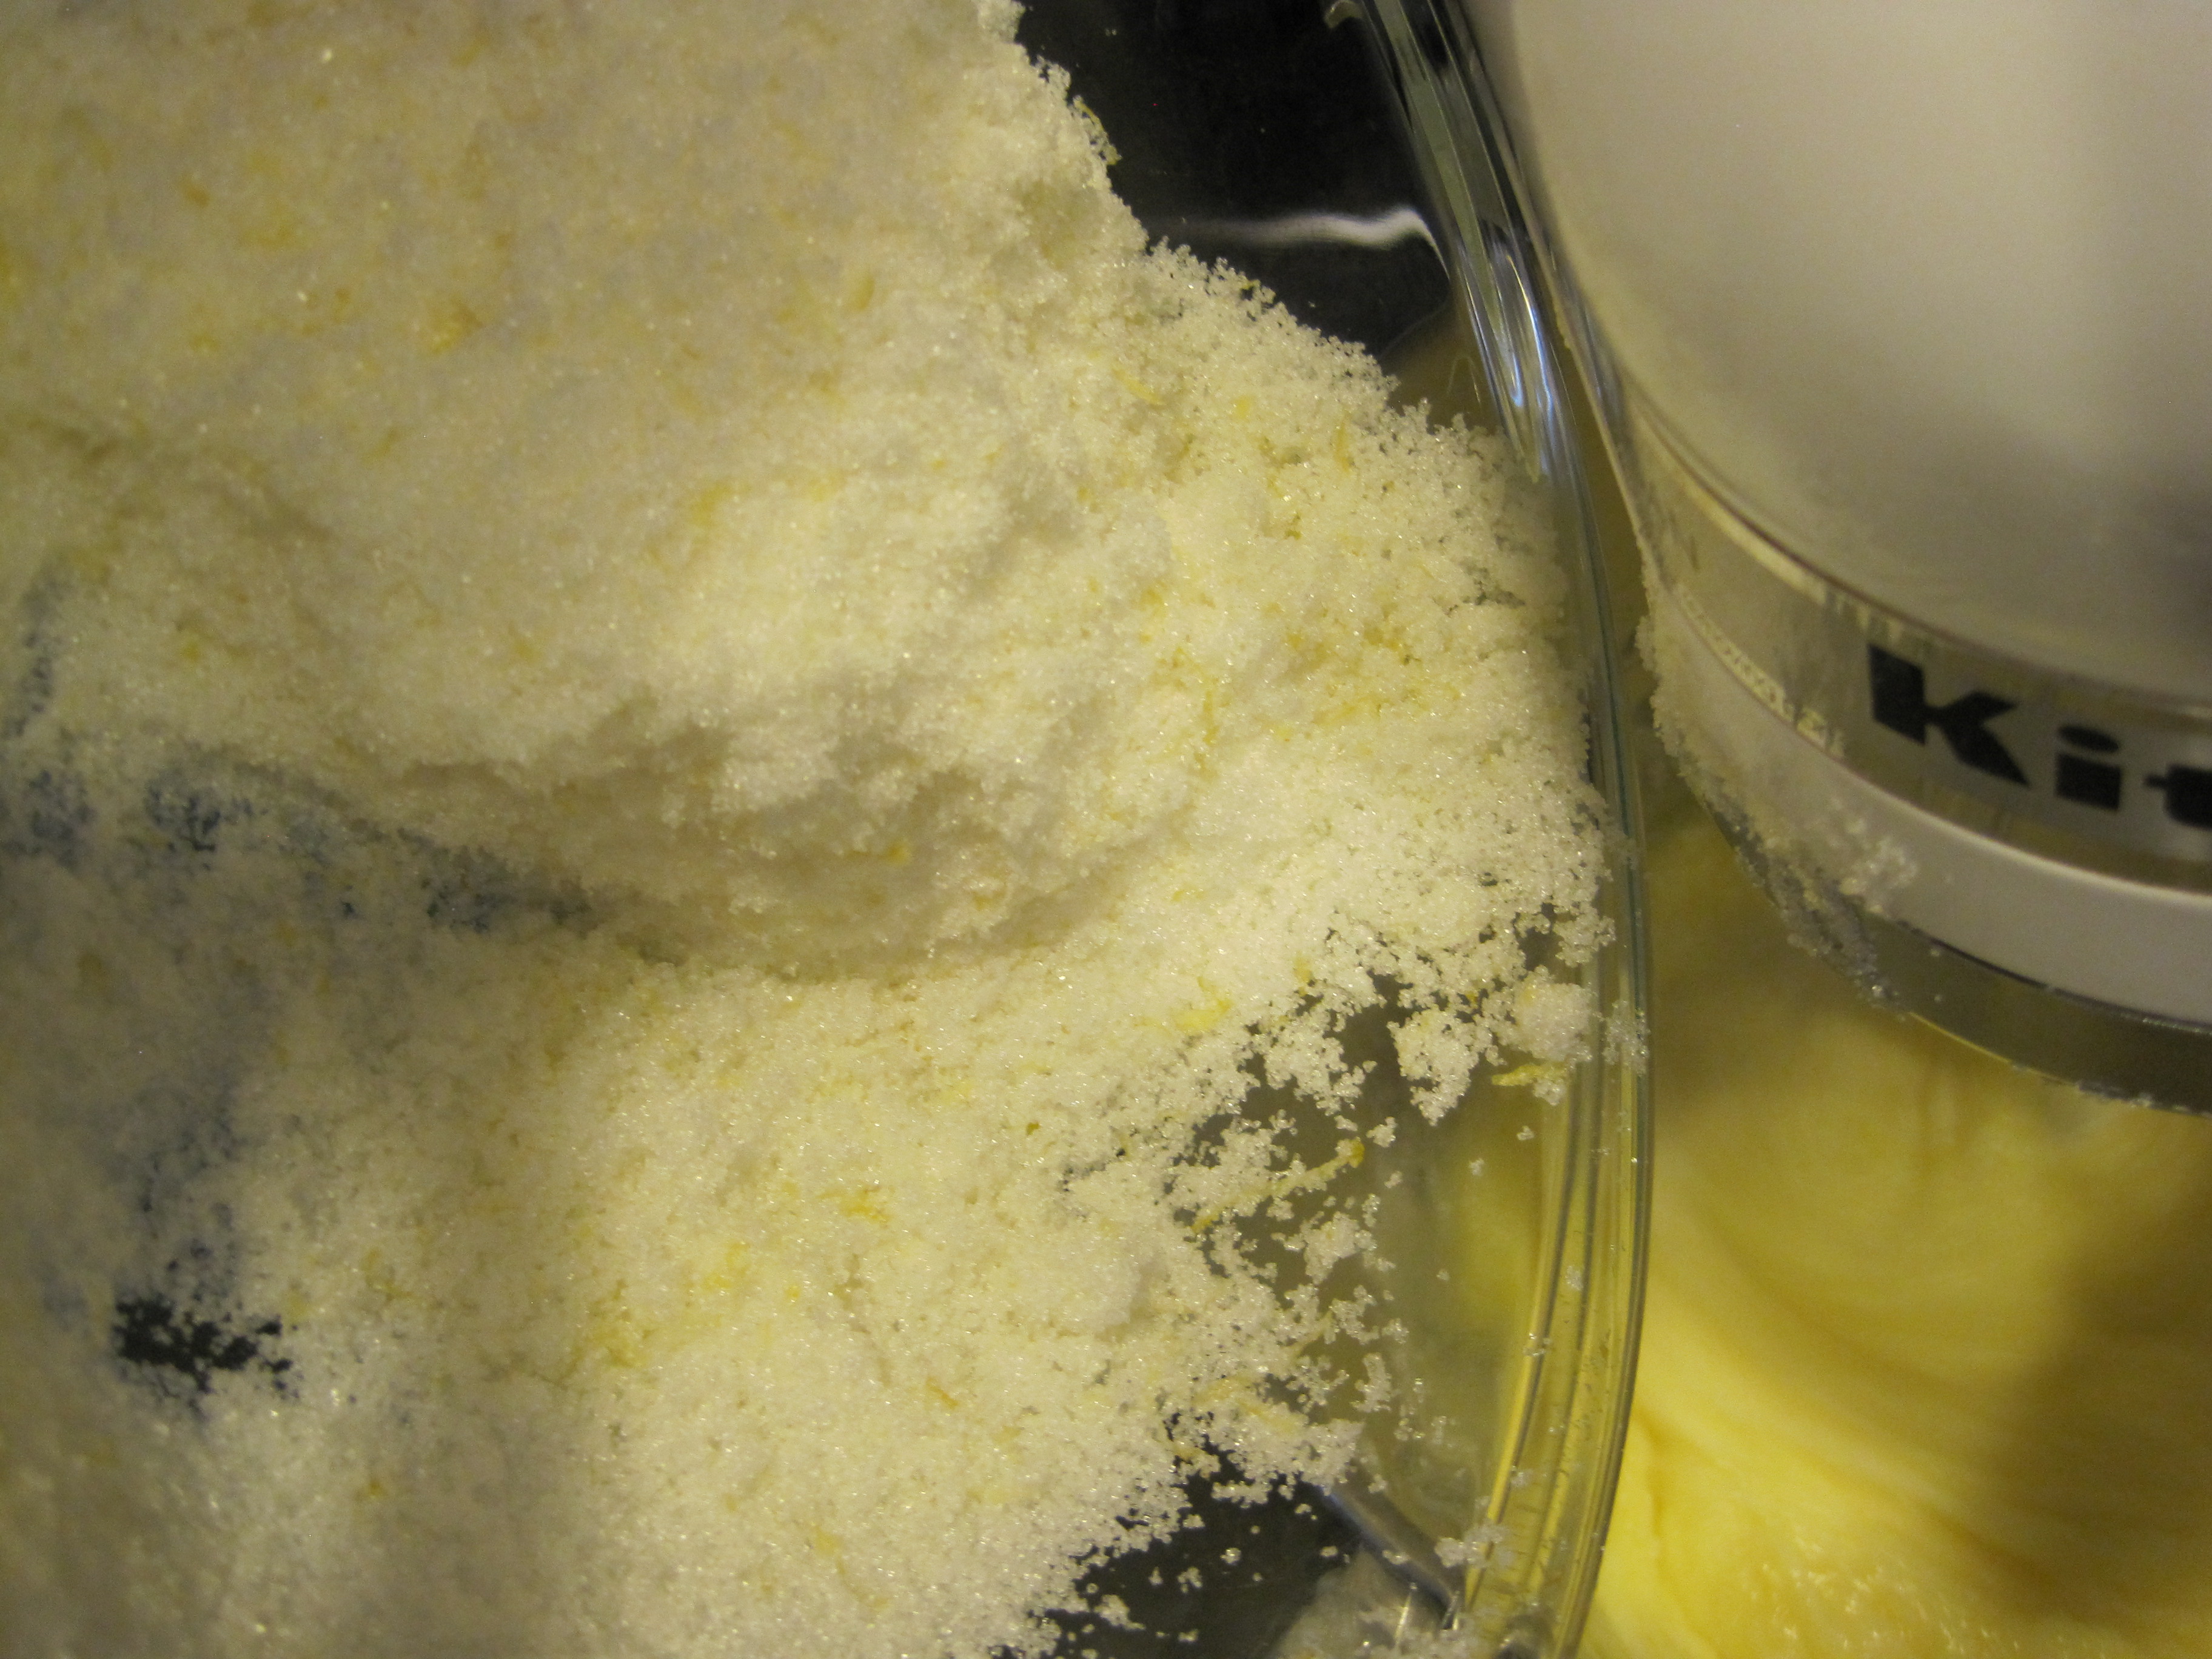
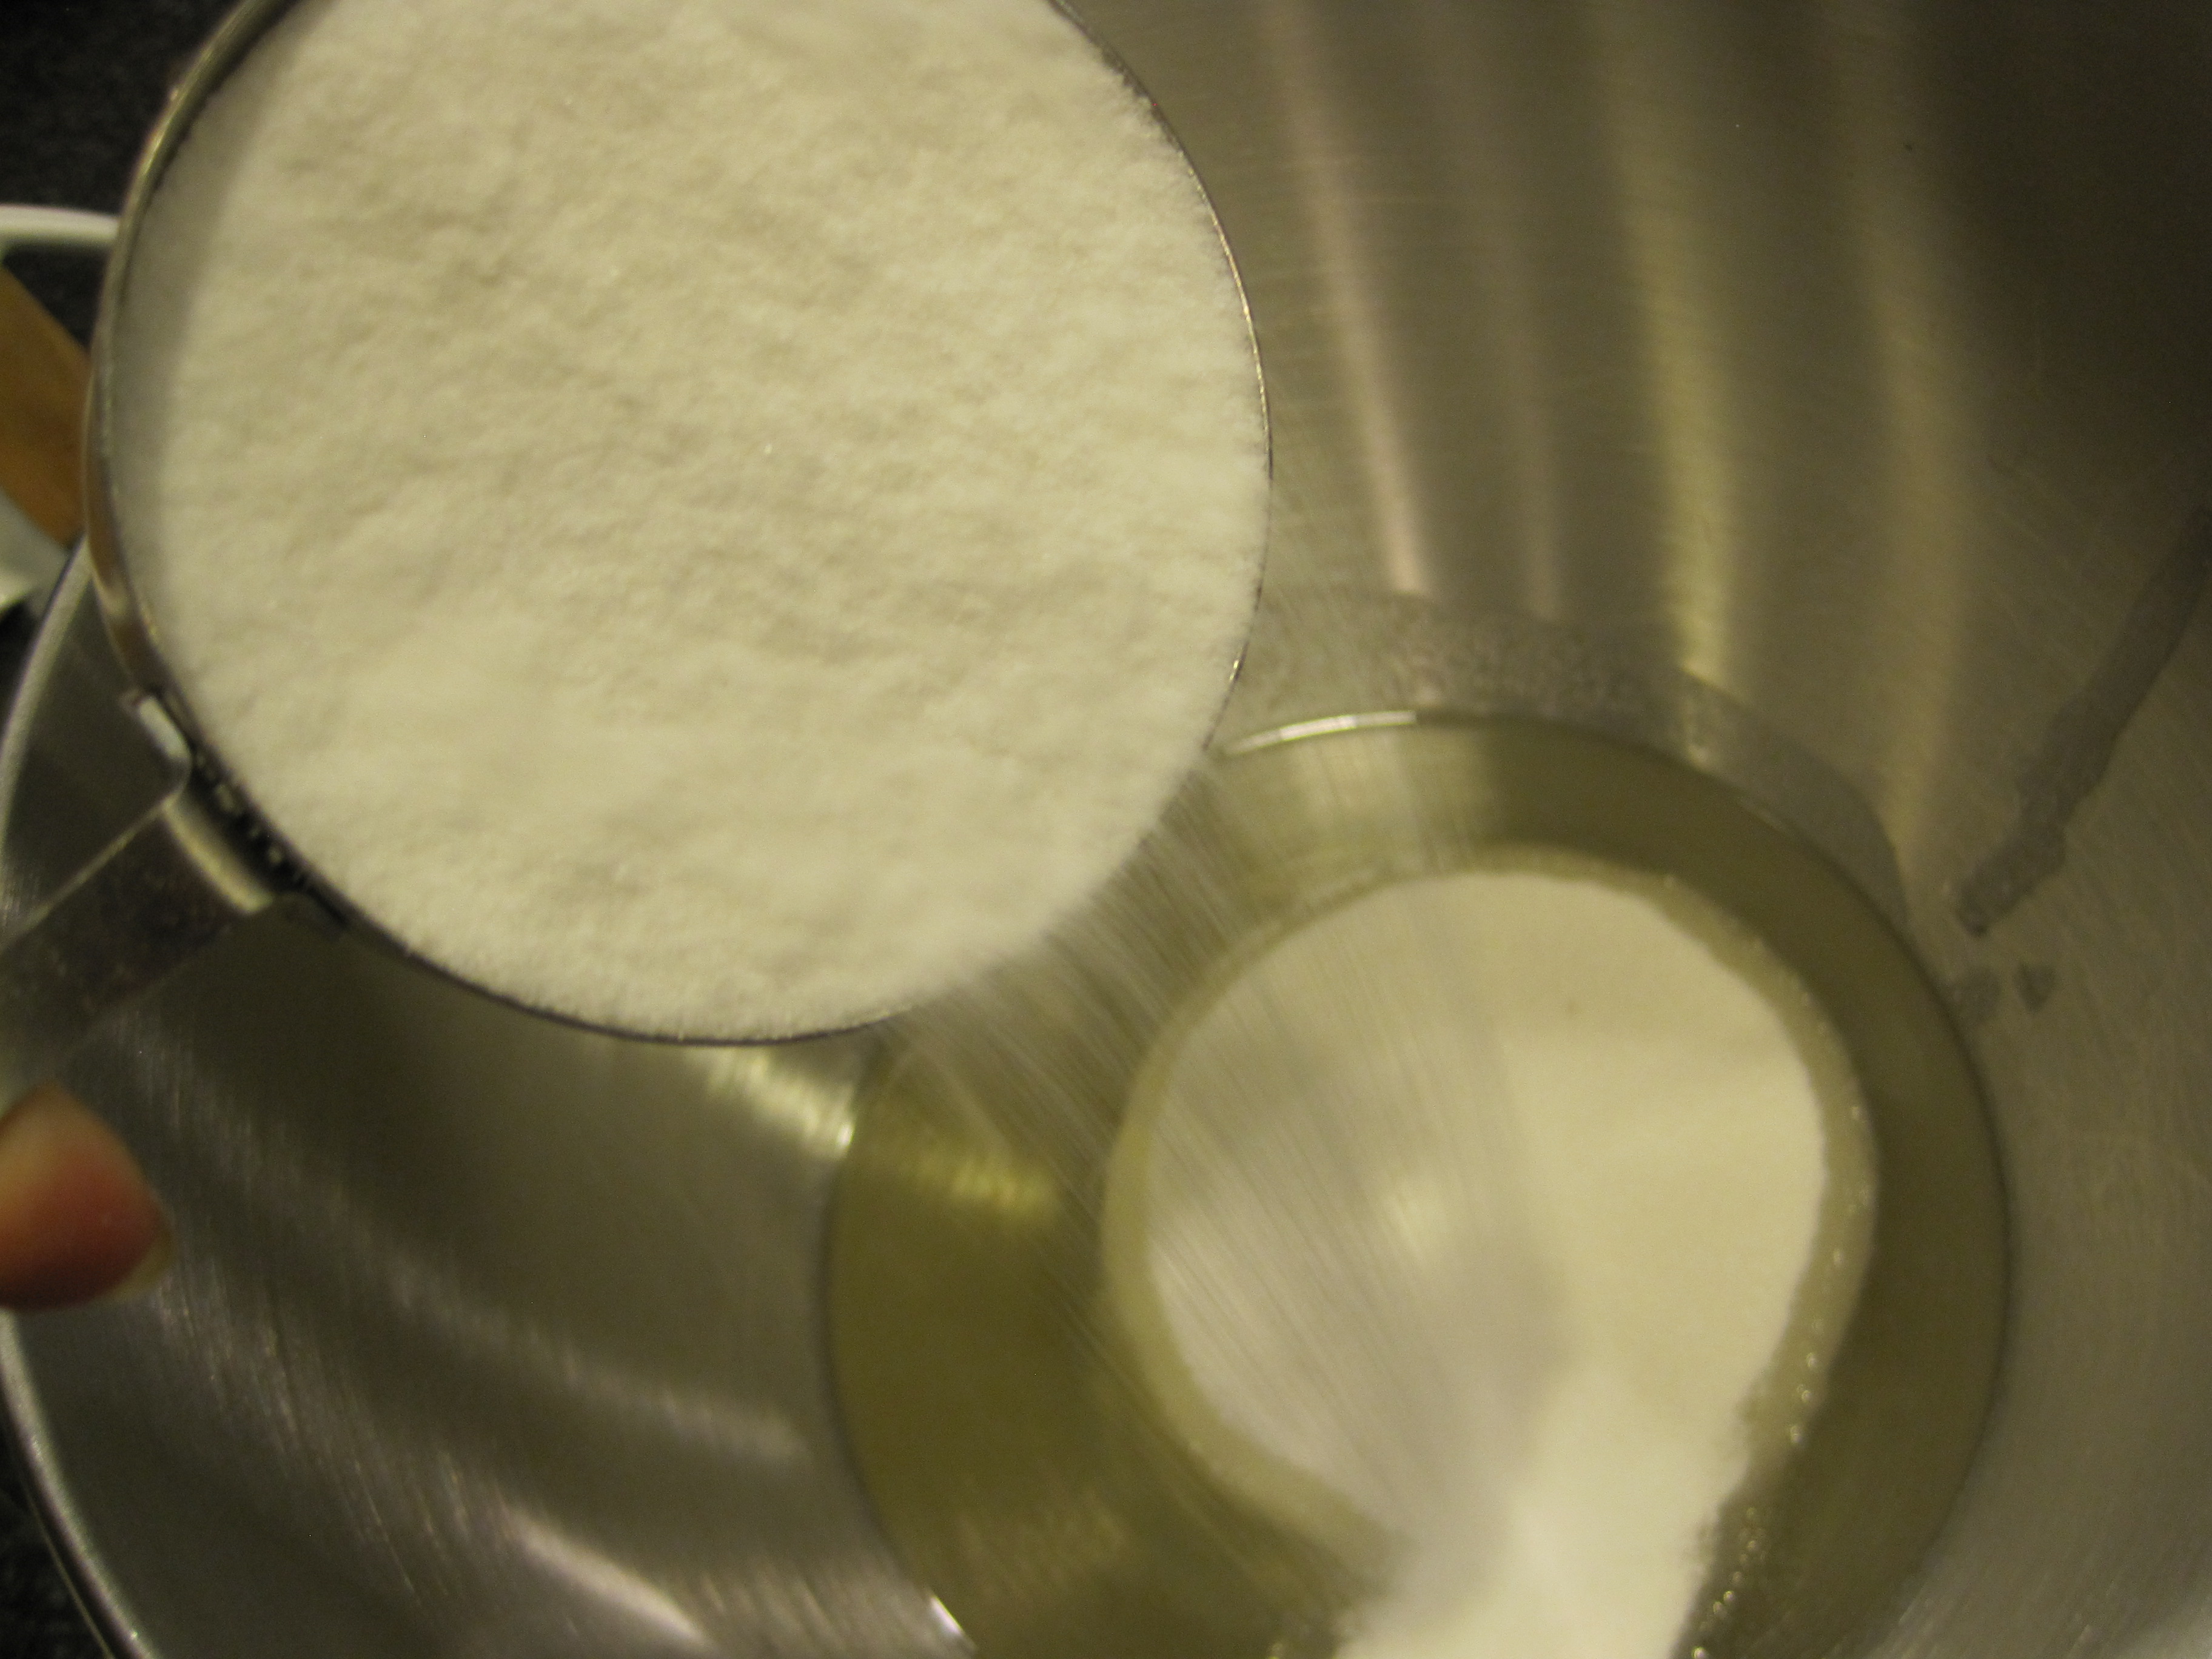
start by making the lemon sugar.

IMG_9625and follow with the easy raspberry swirl.

IMG_9628

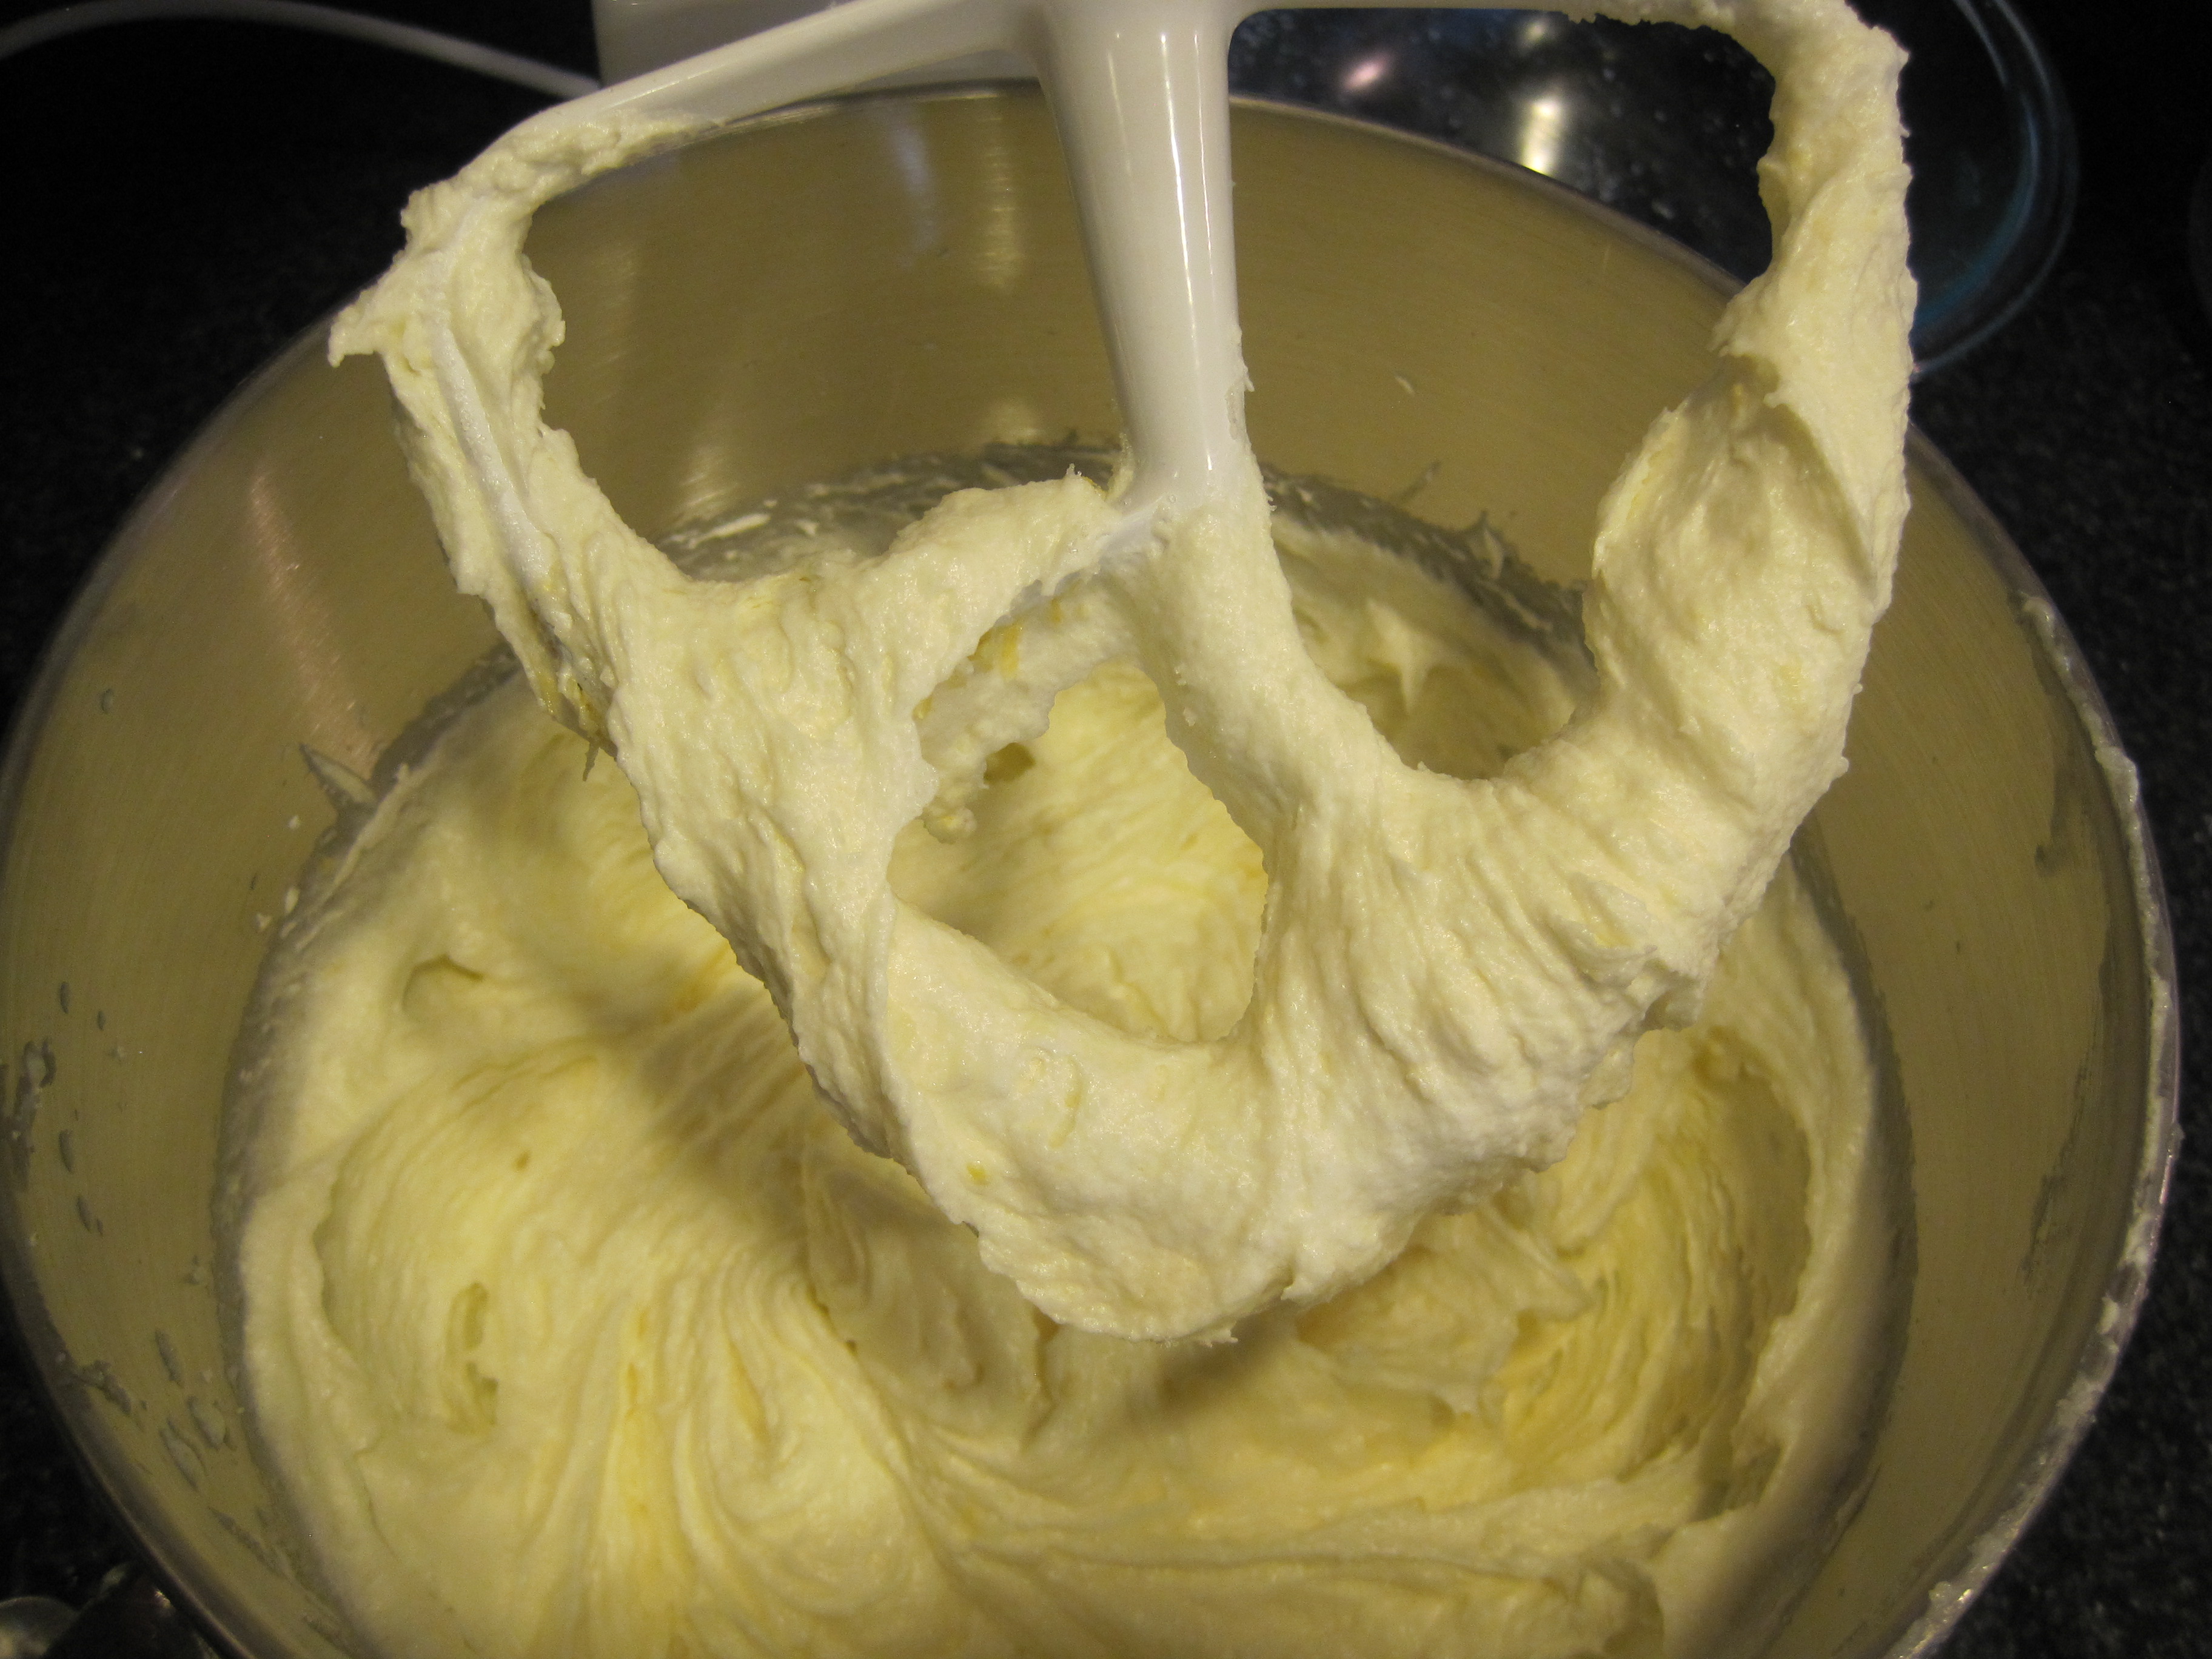
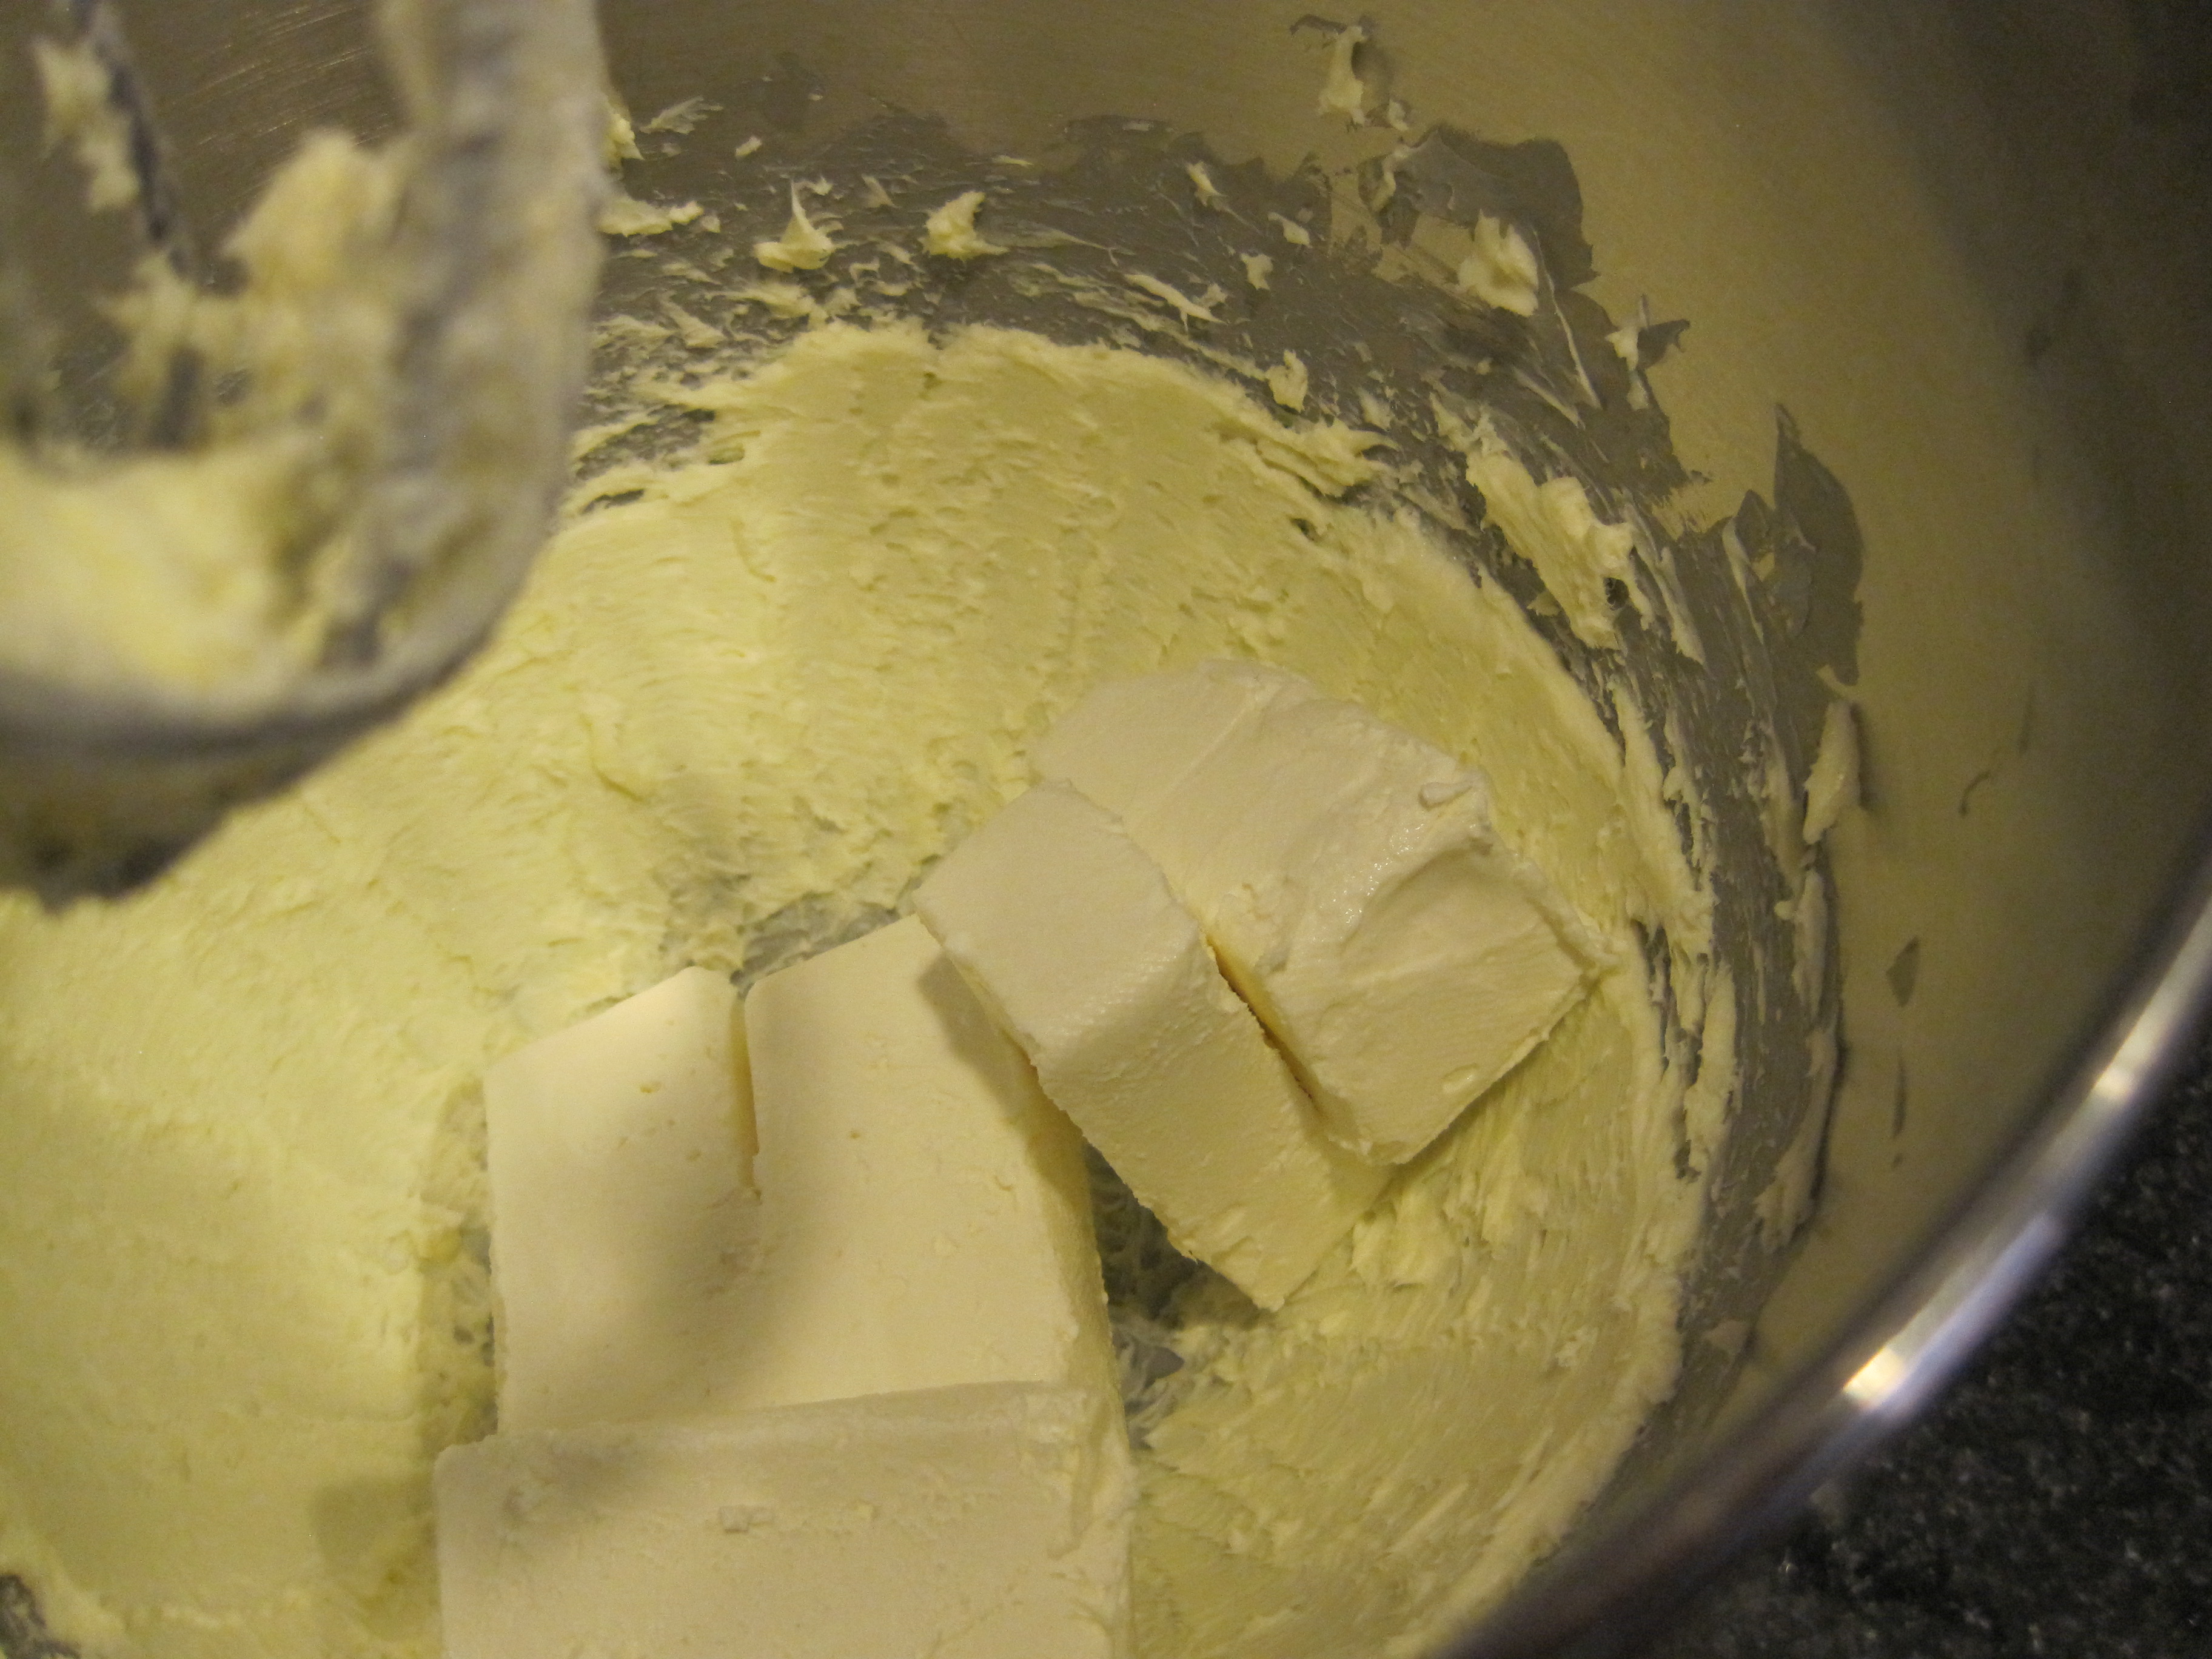
beat cream cheese until fluffy and creamy.

IMG_9632

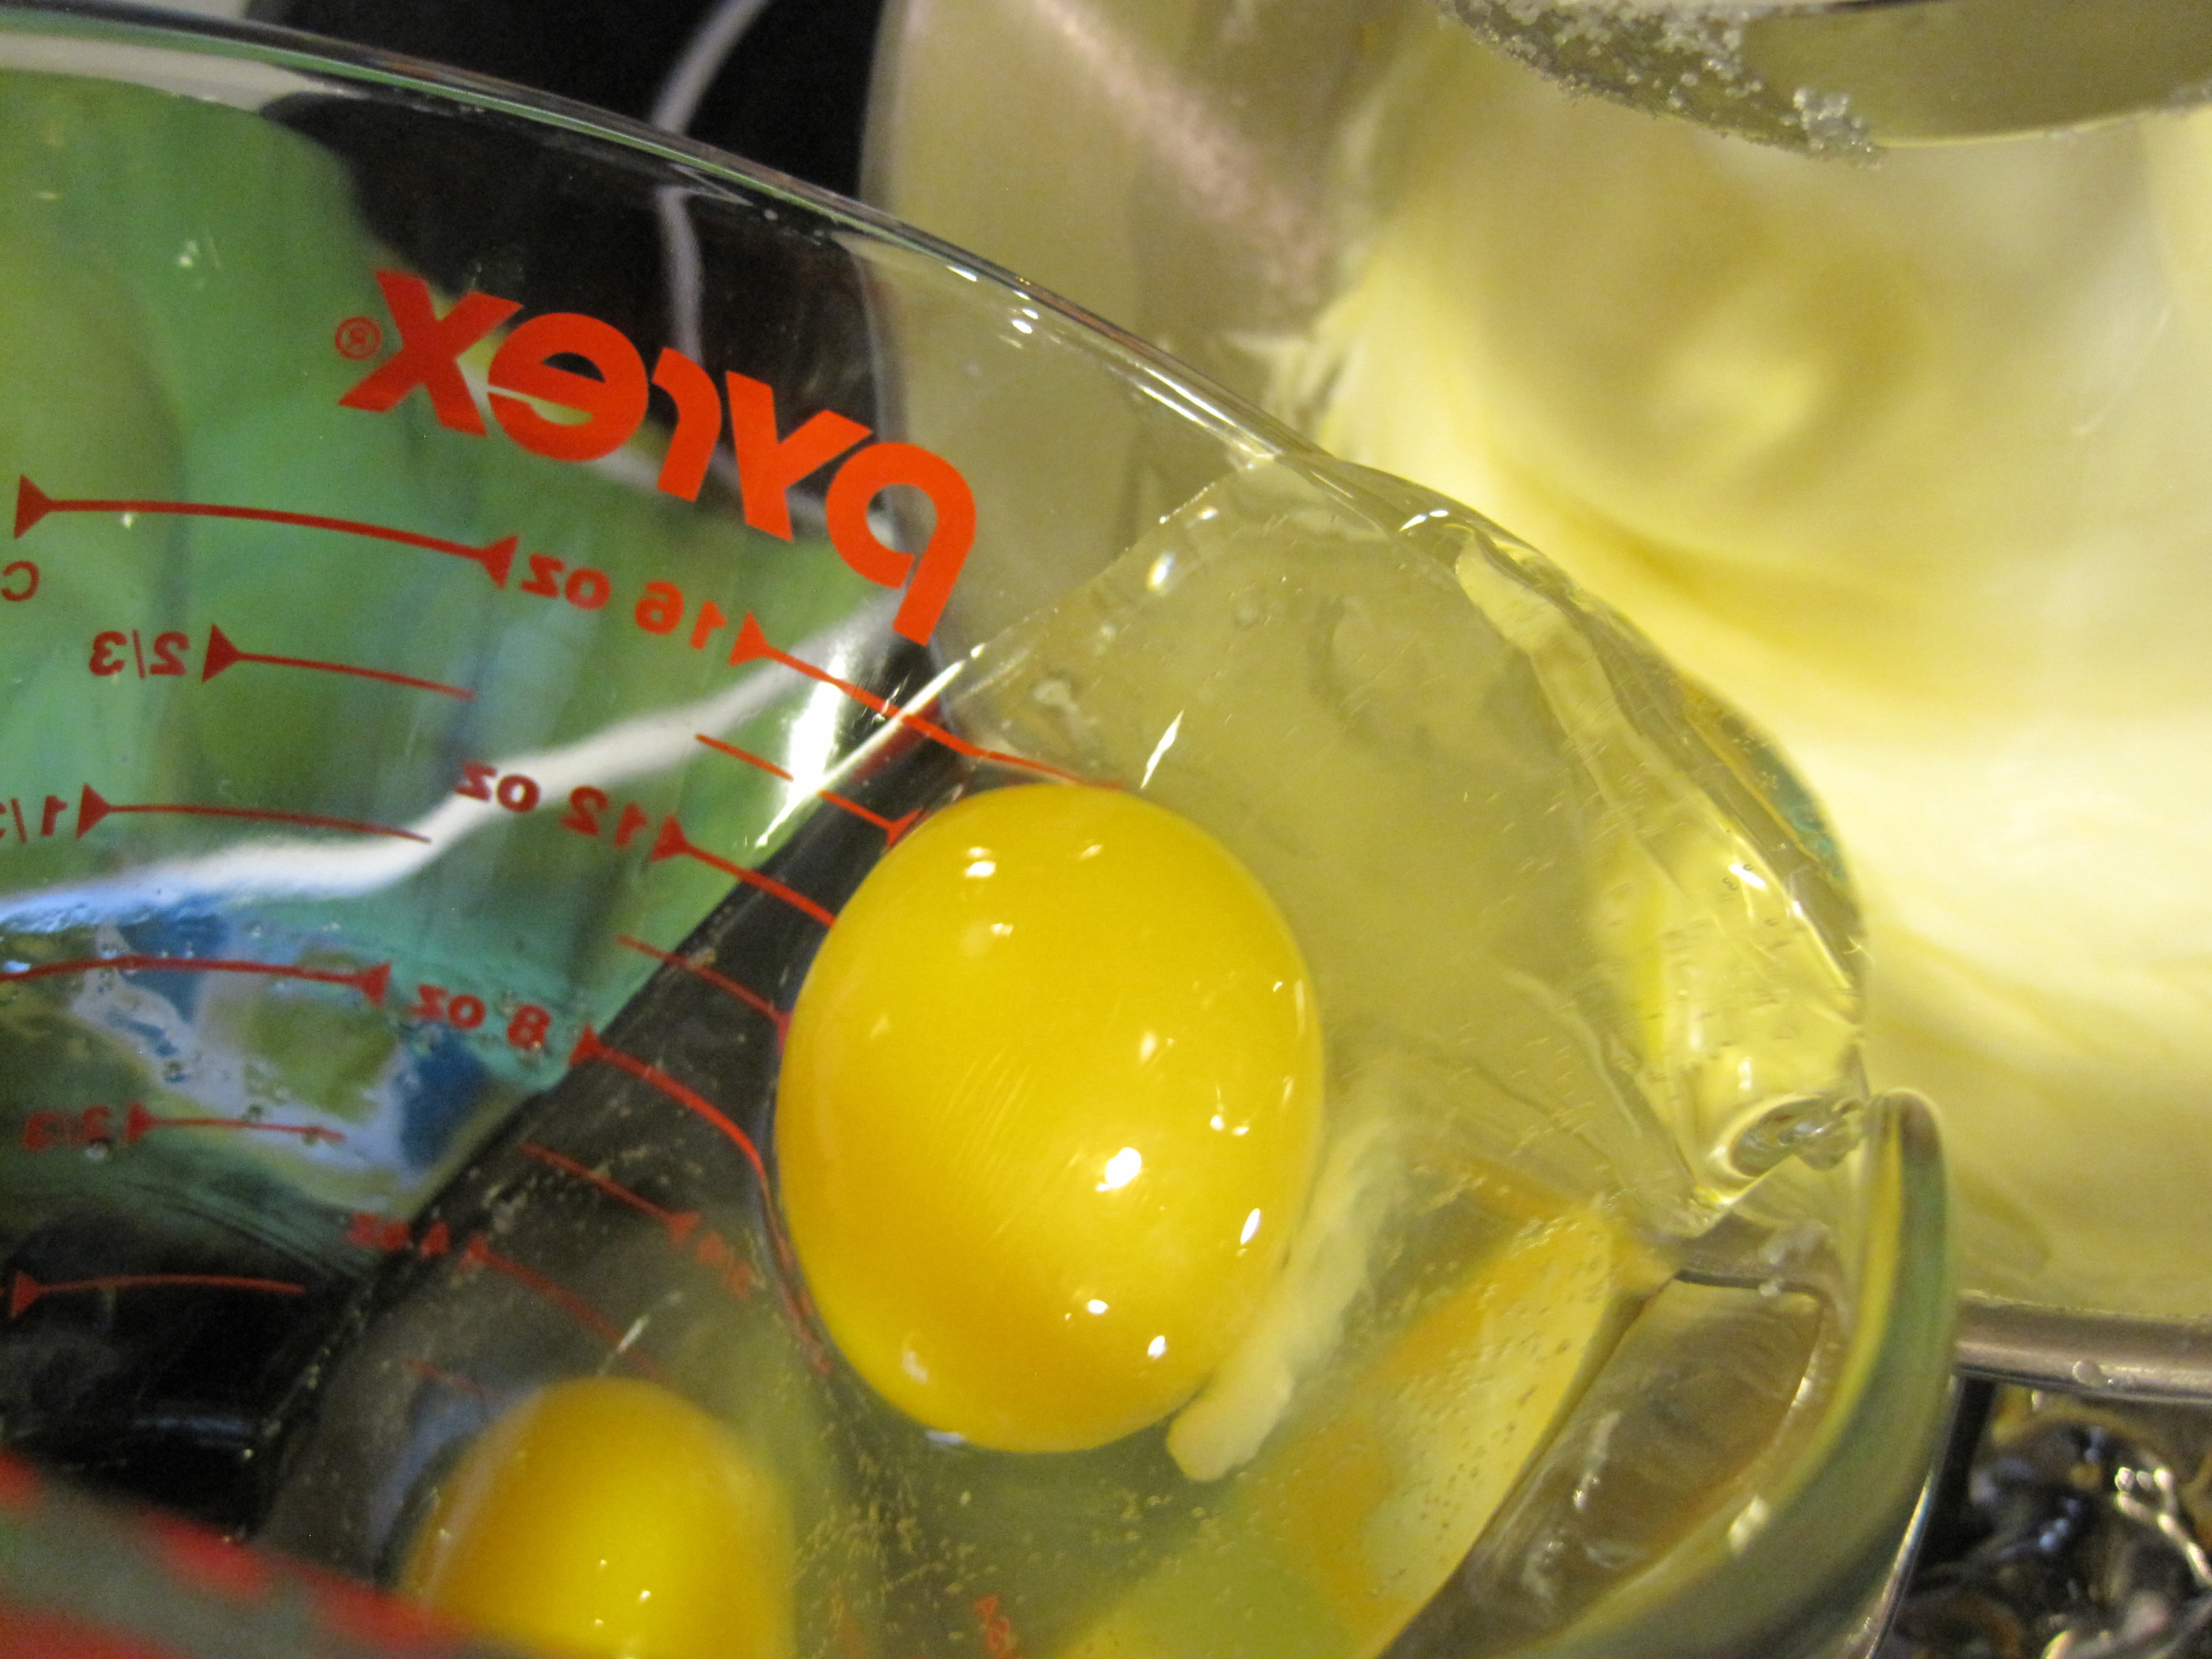
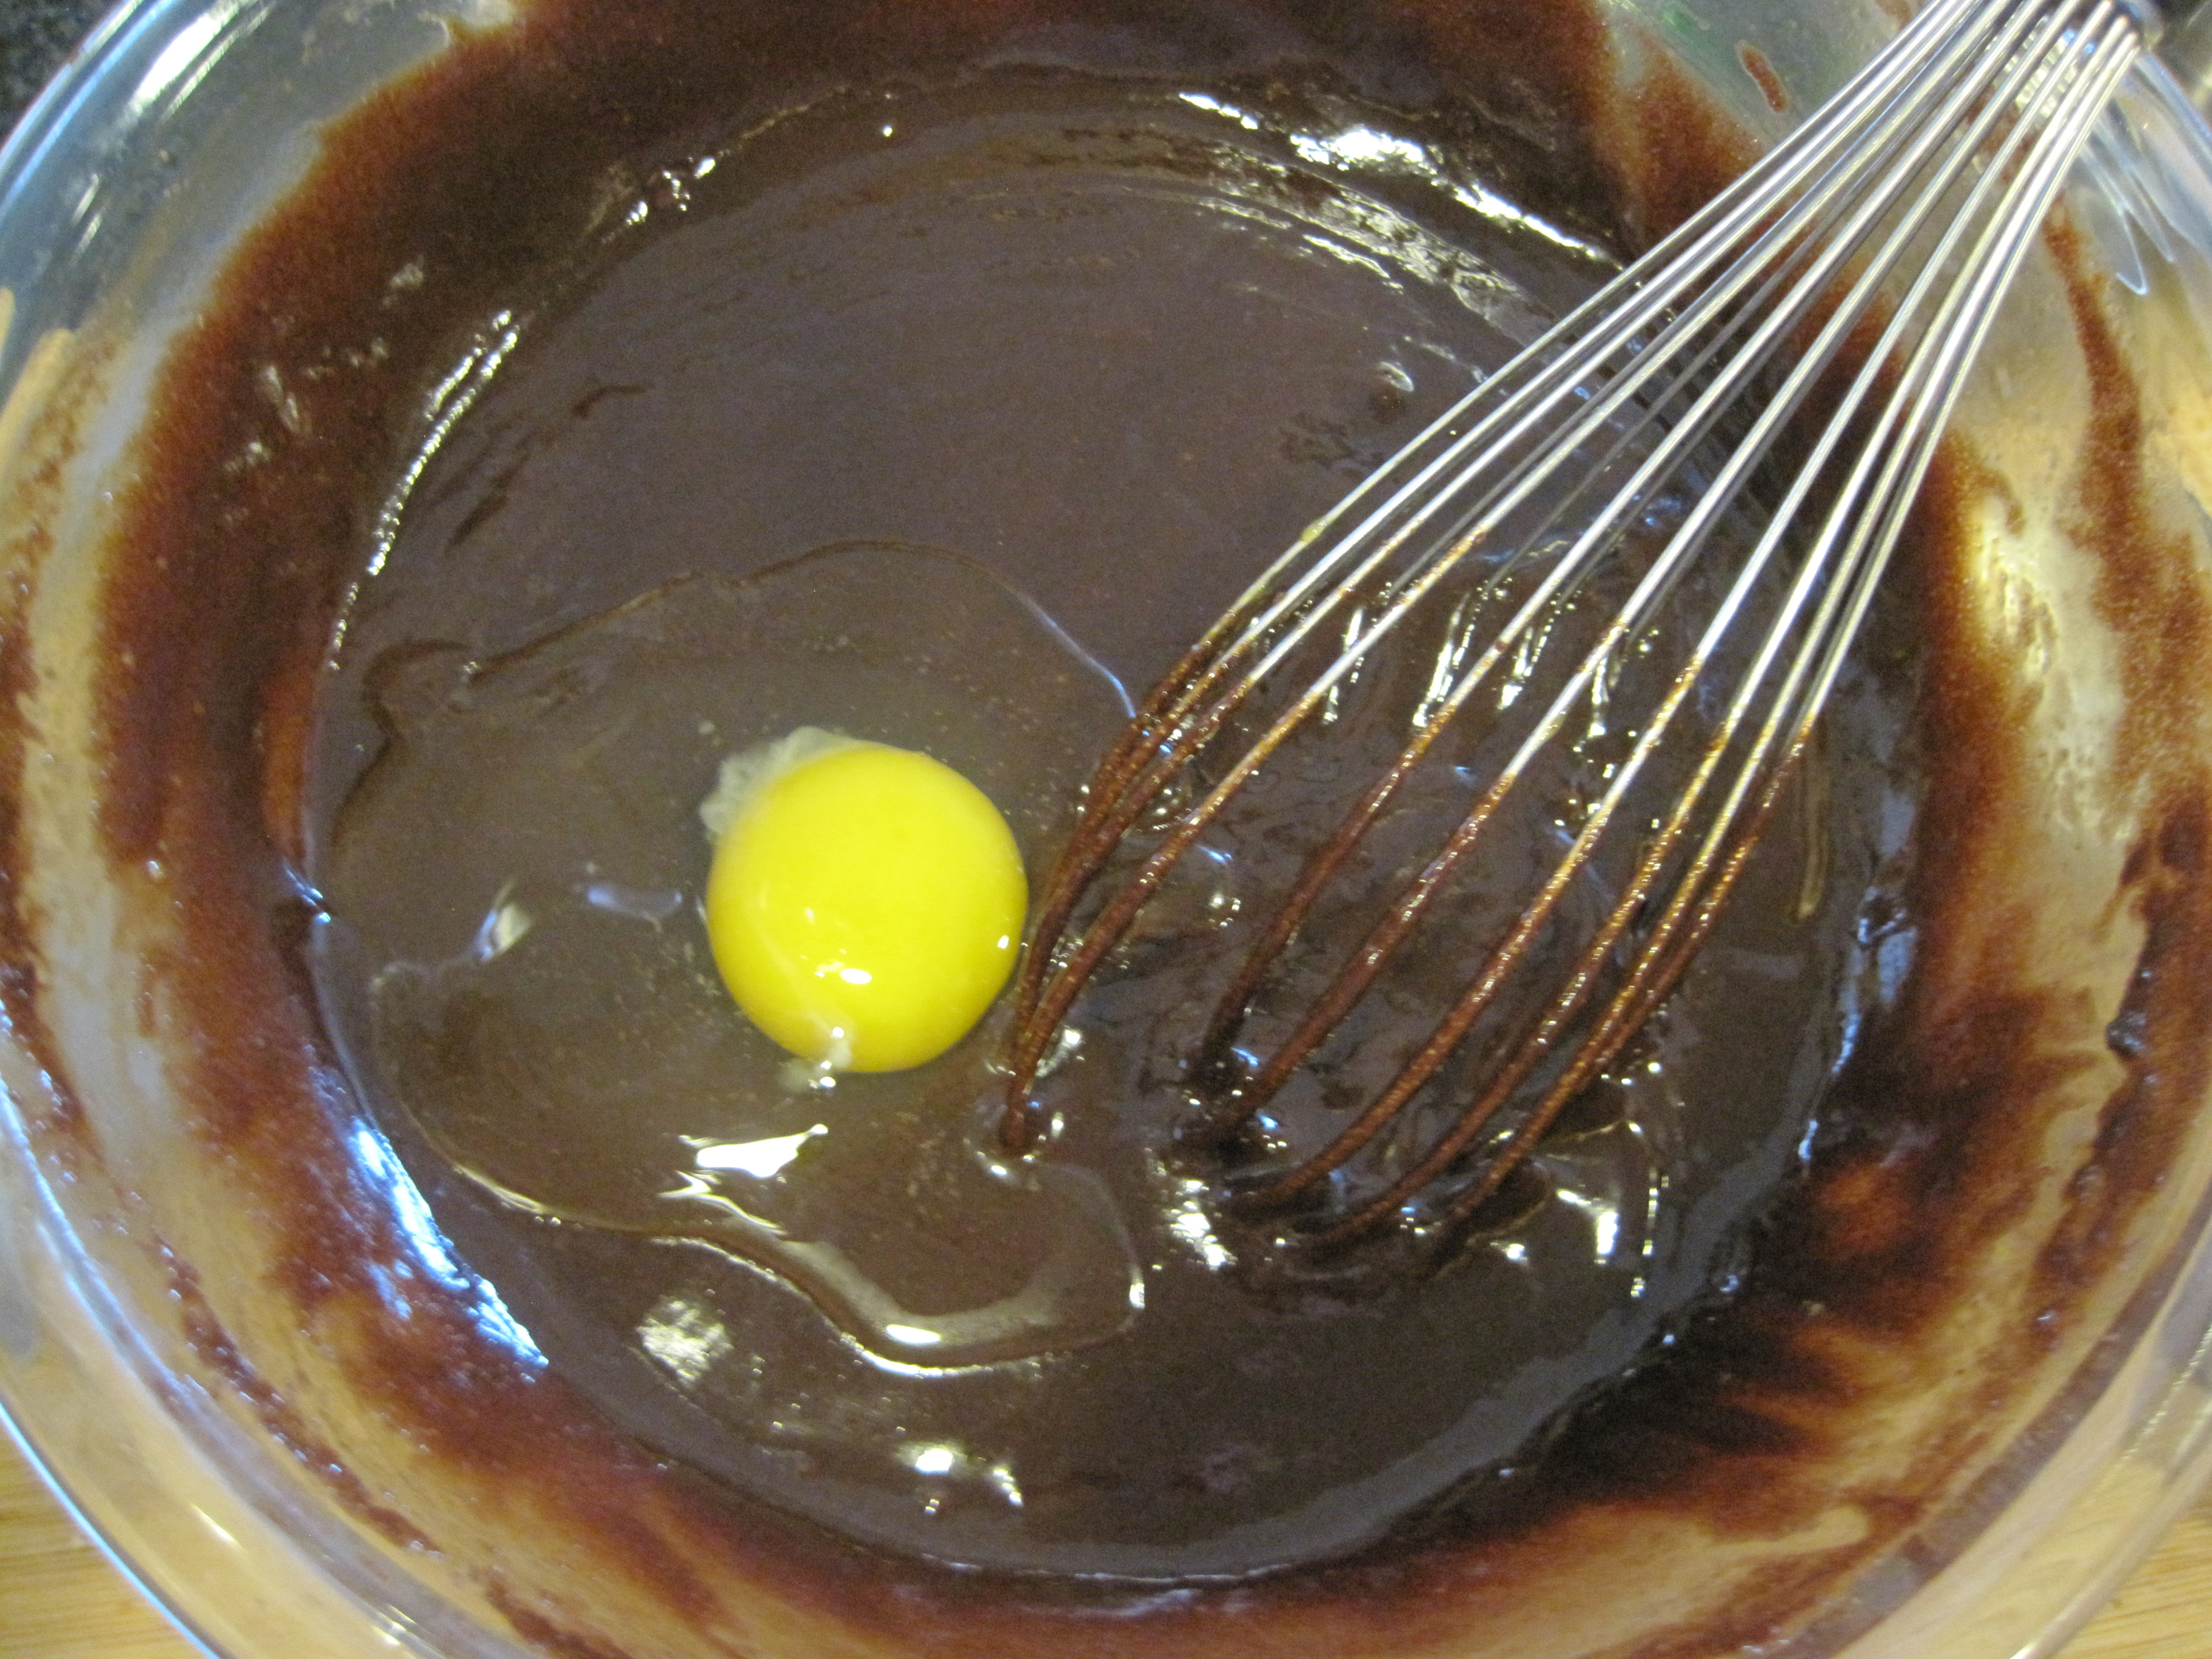
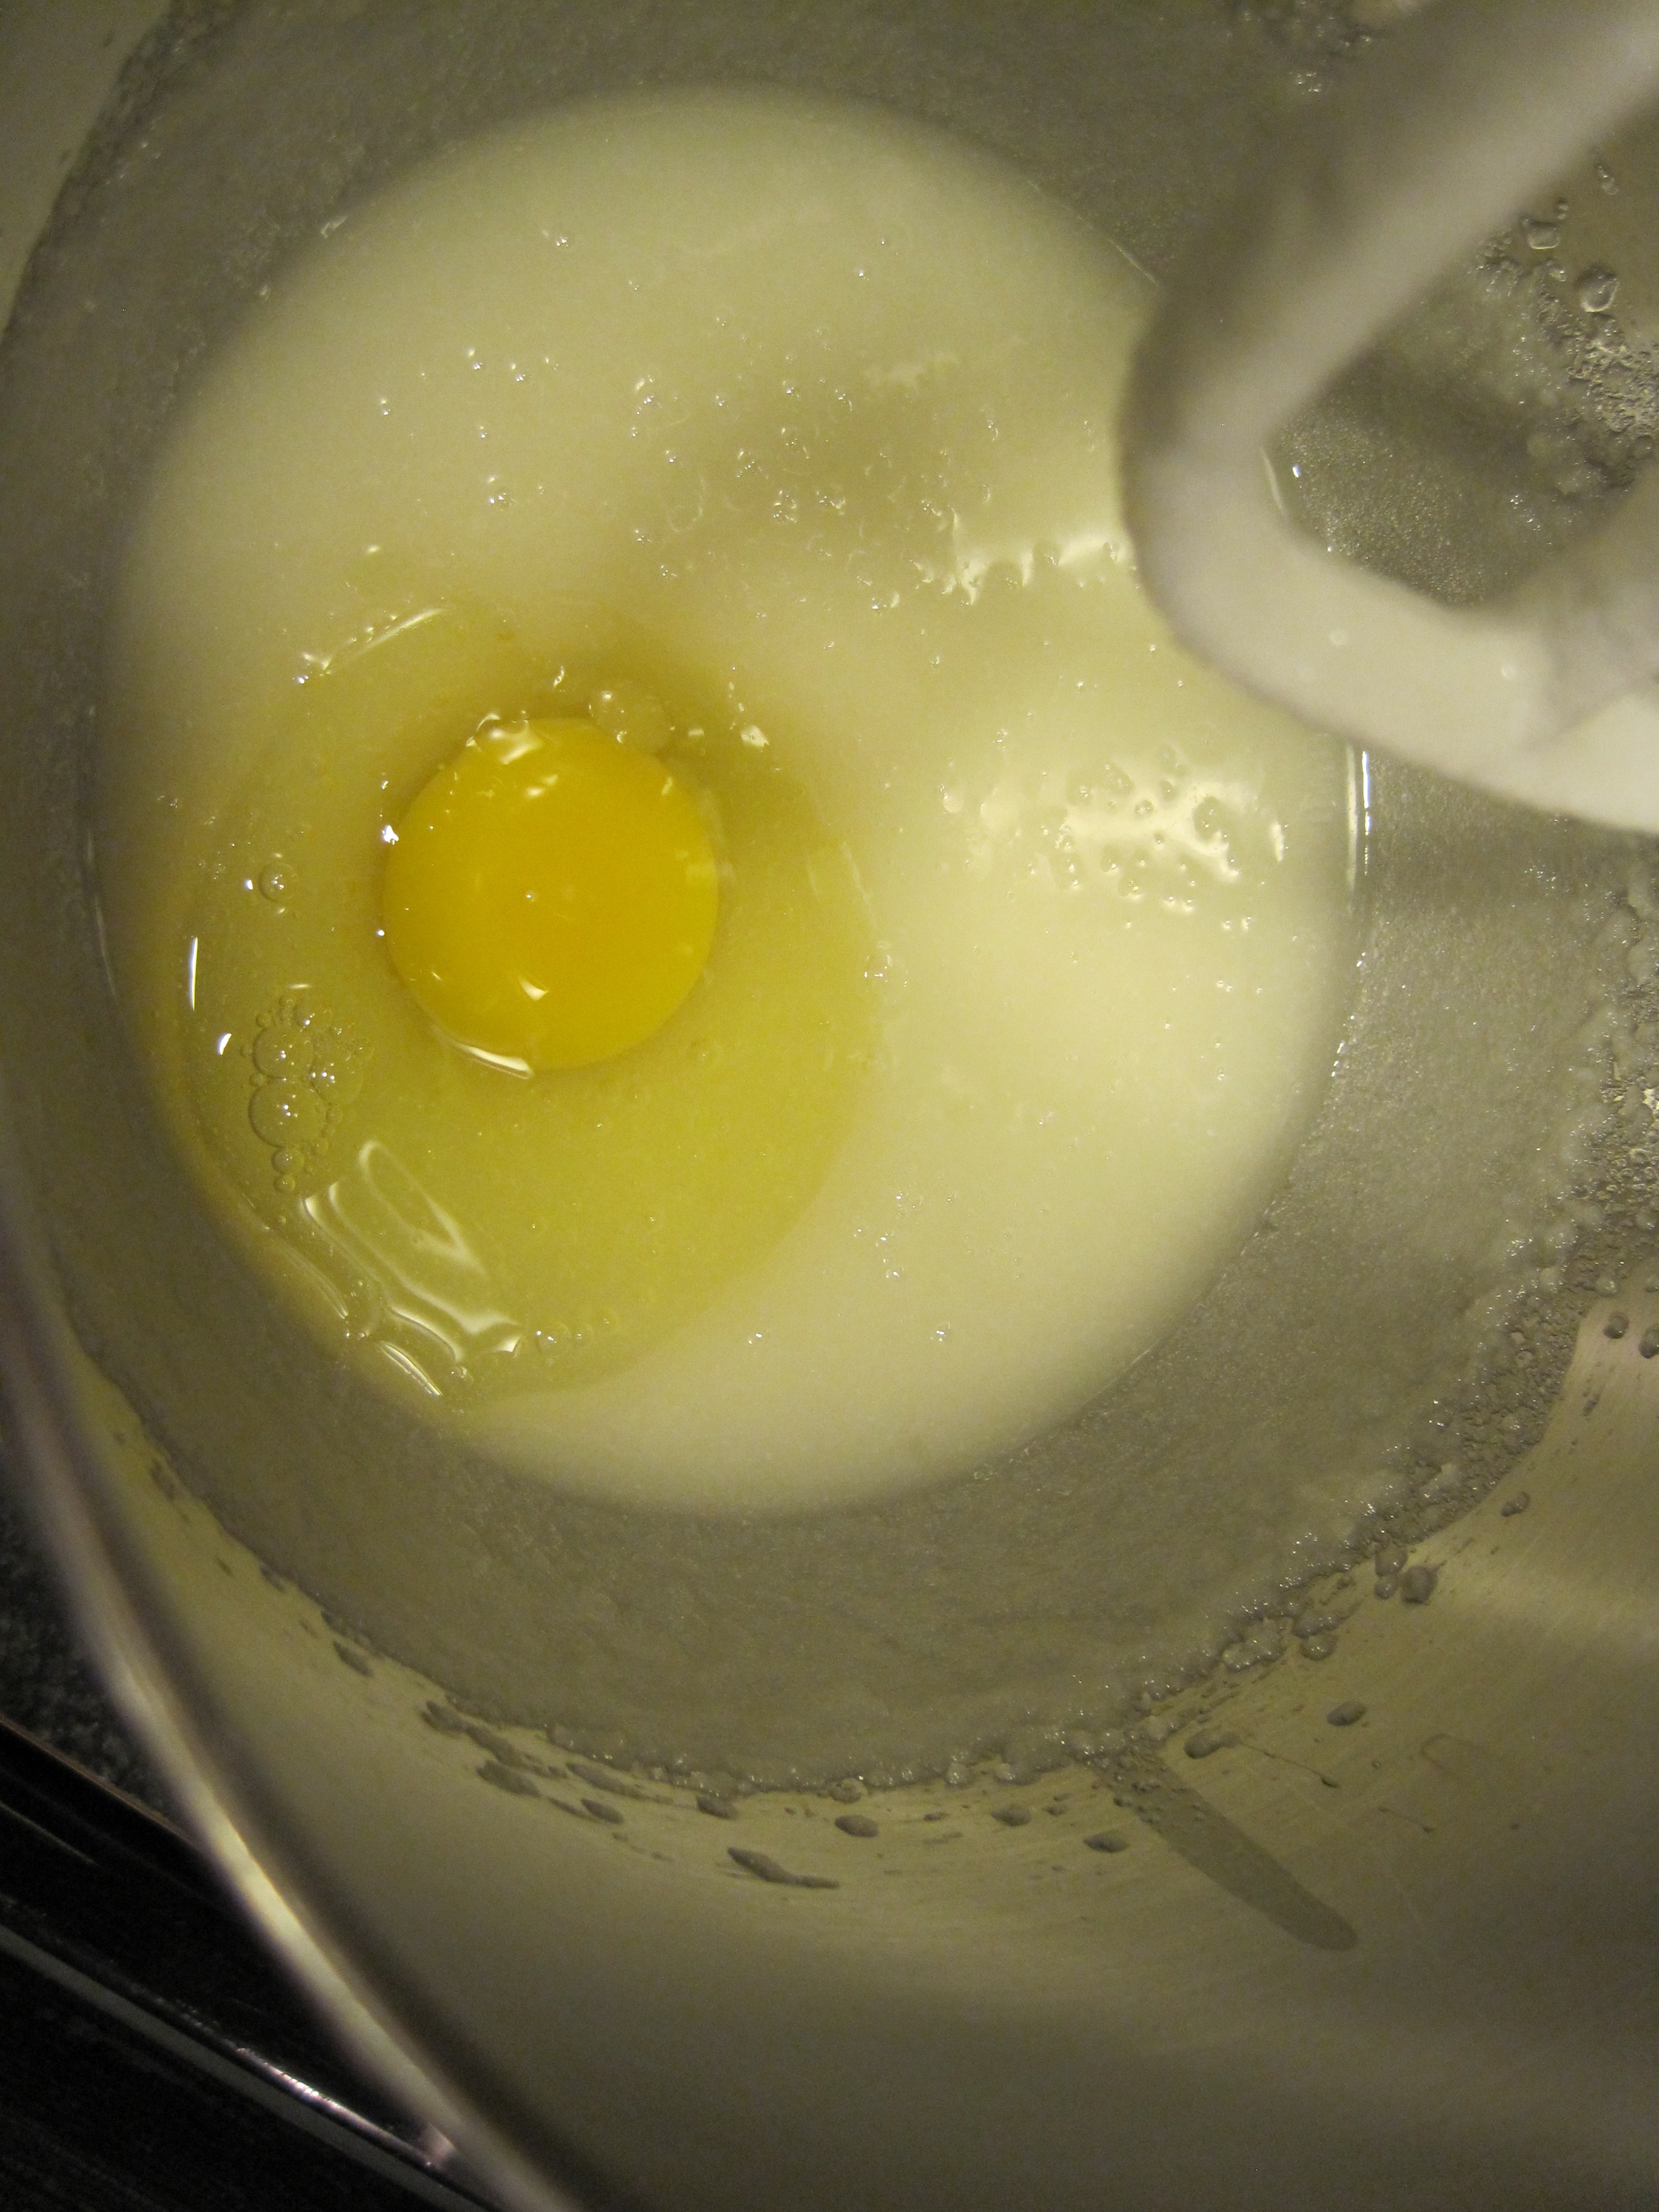
add melted butter, lemon sugar and eggs. your house should smell amazing by now!

IMG_9633

IMG_9634

IMG_9636

IMG_9637

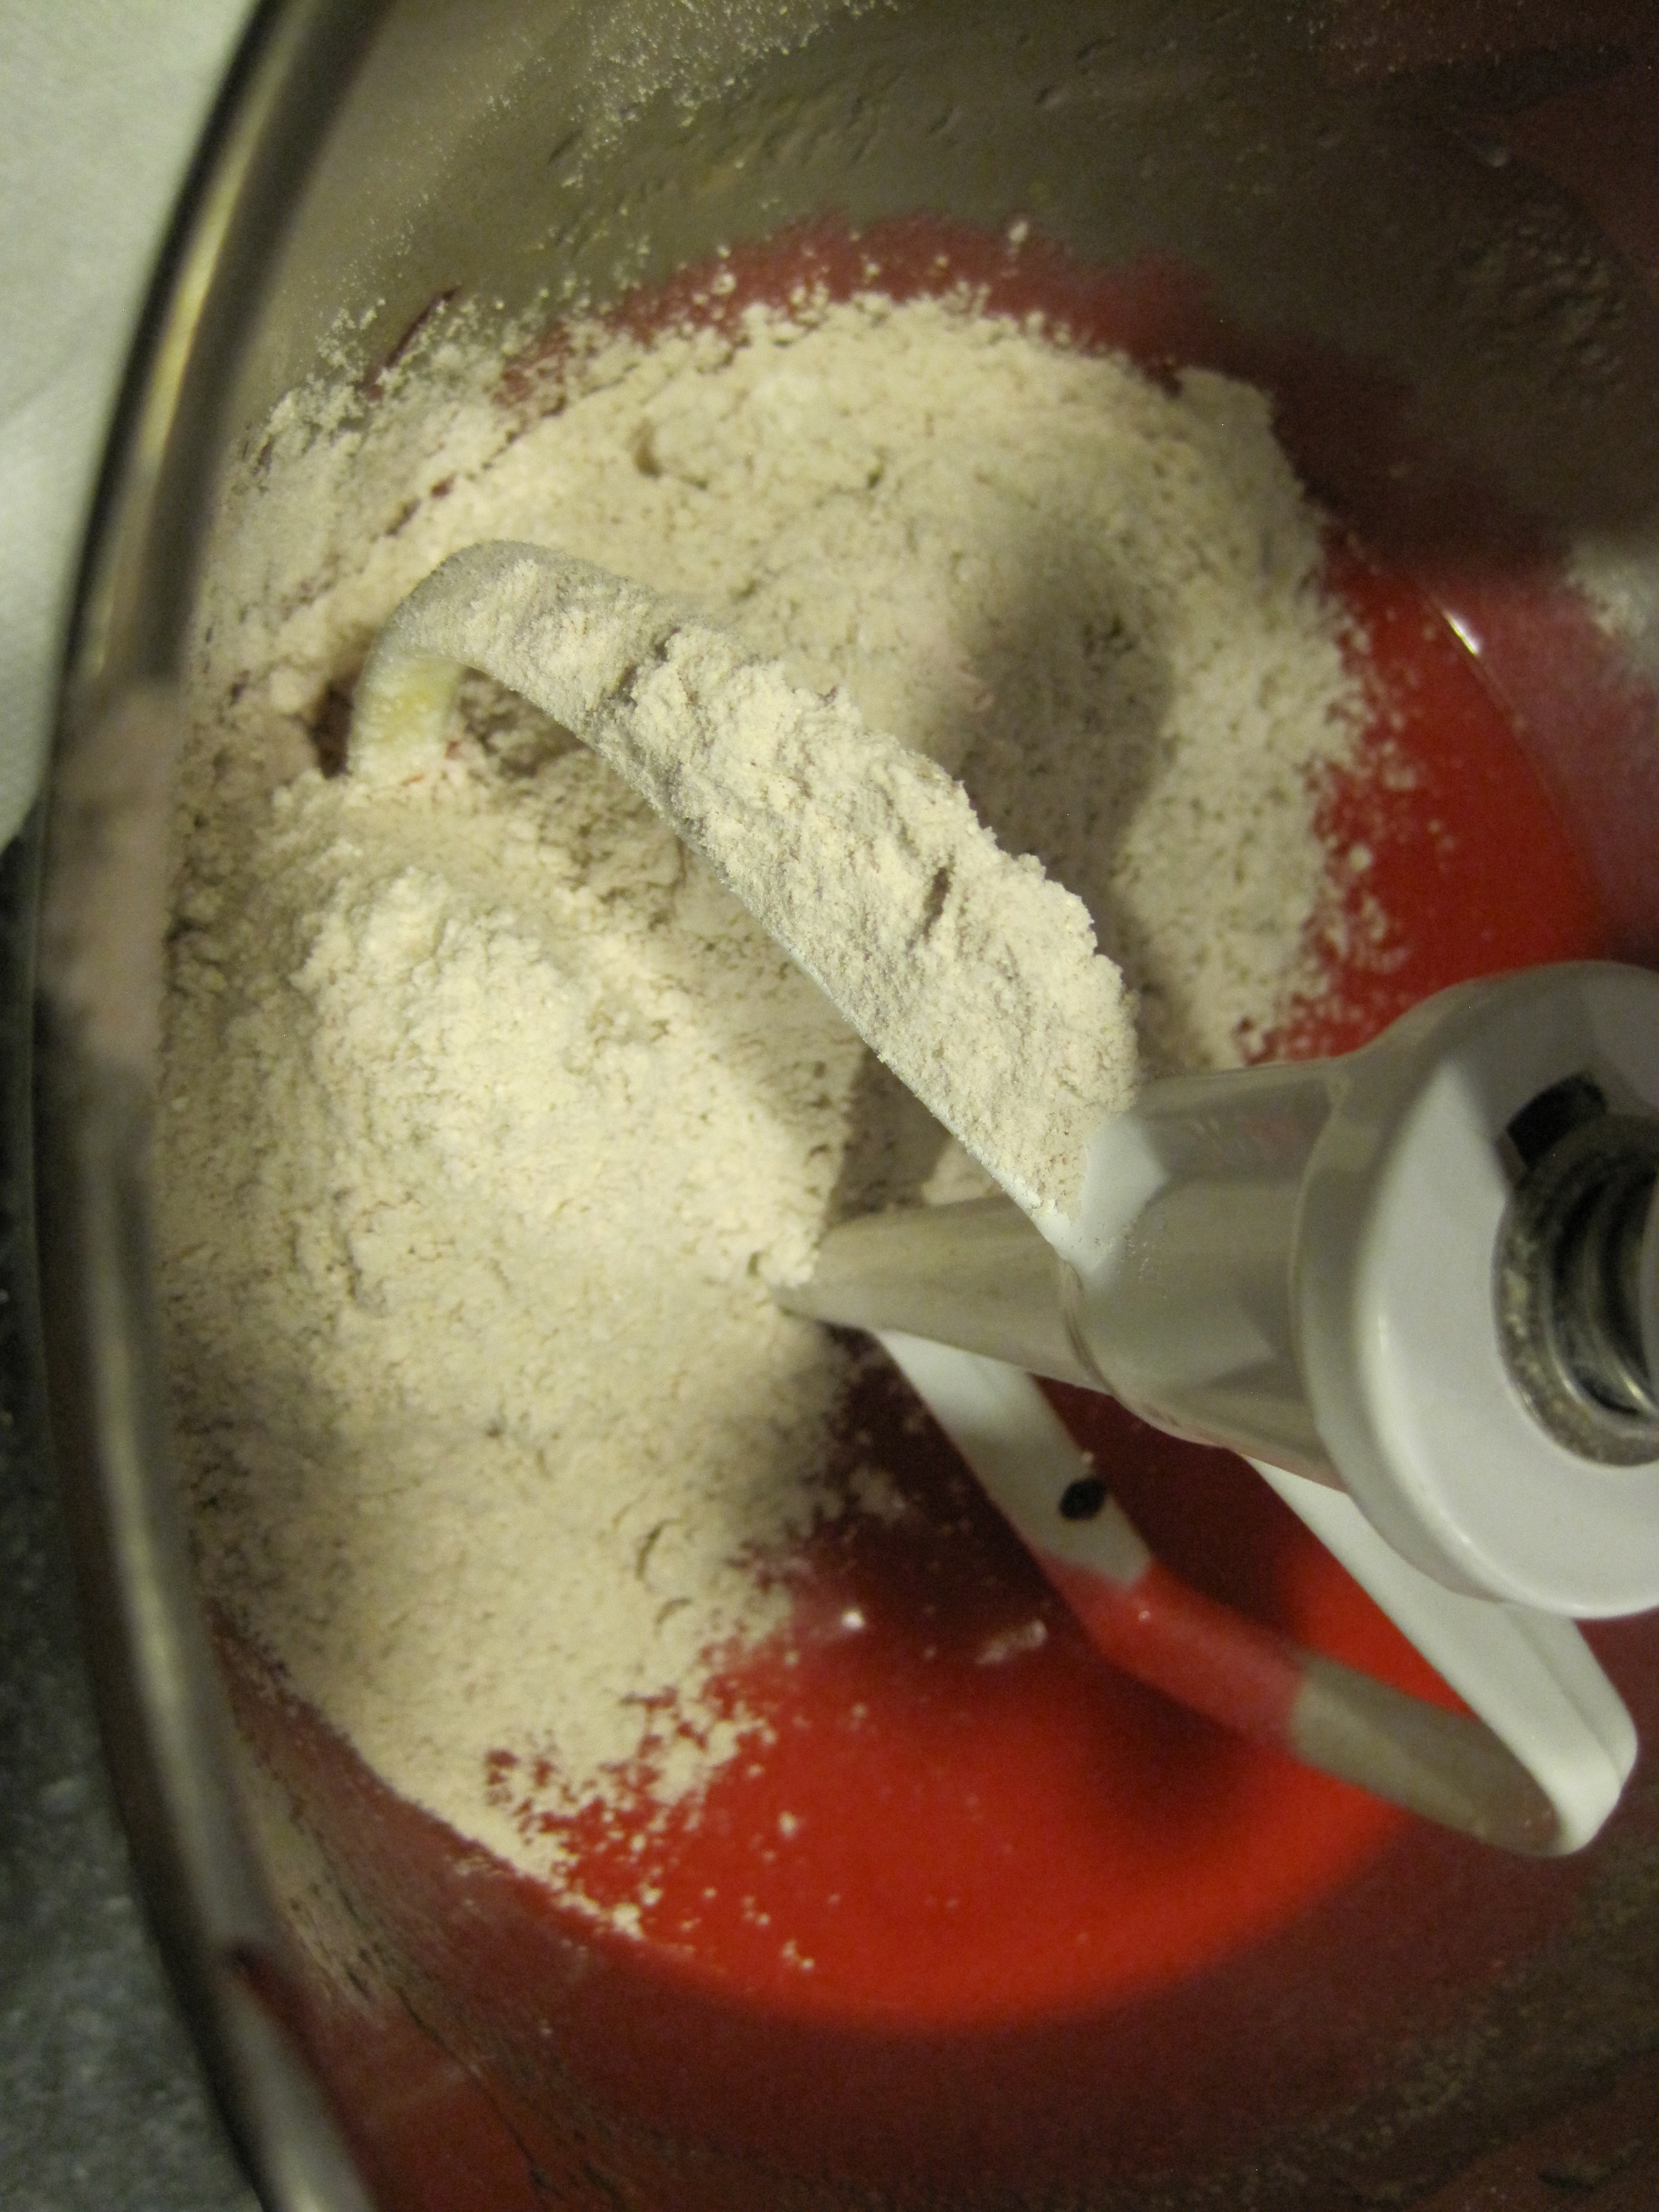
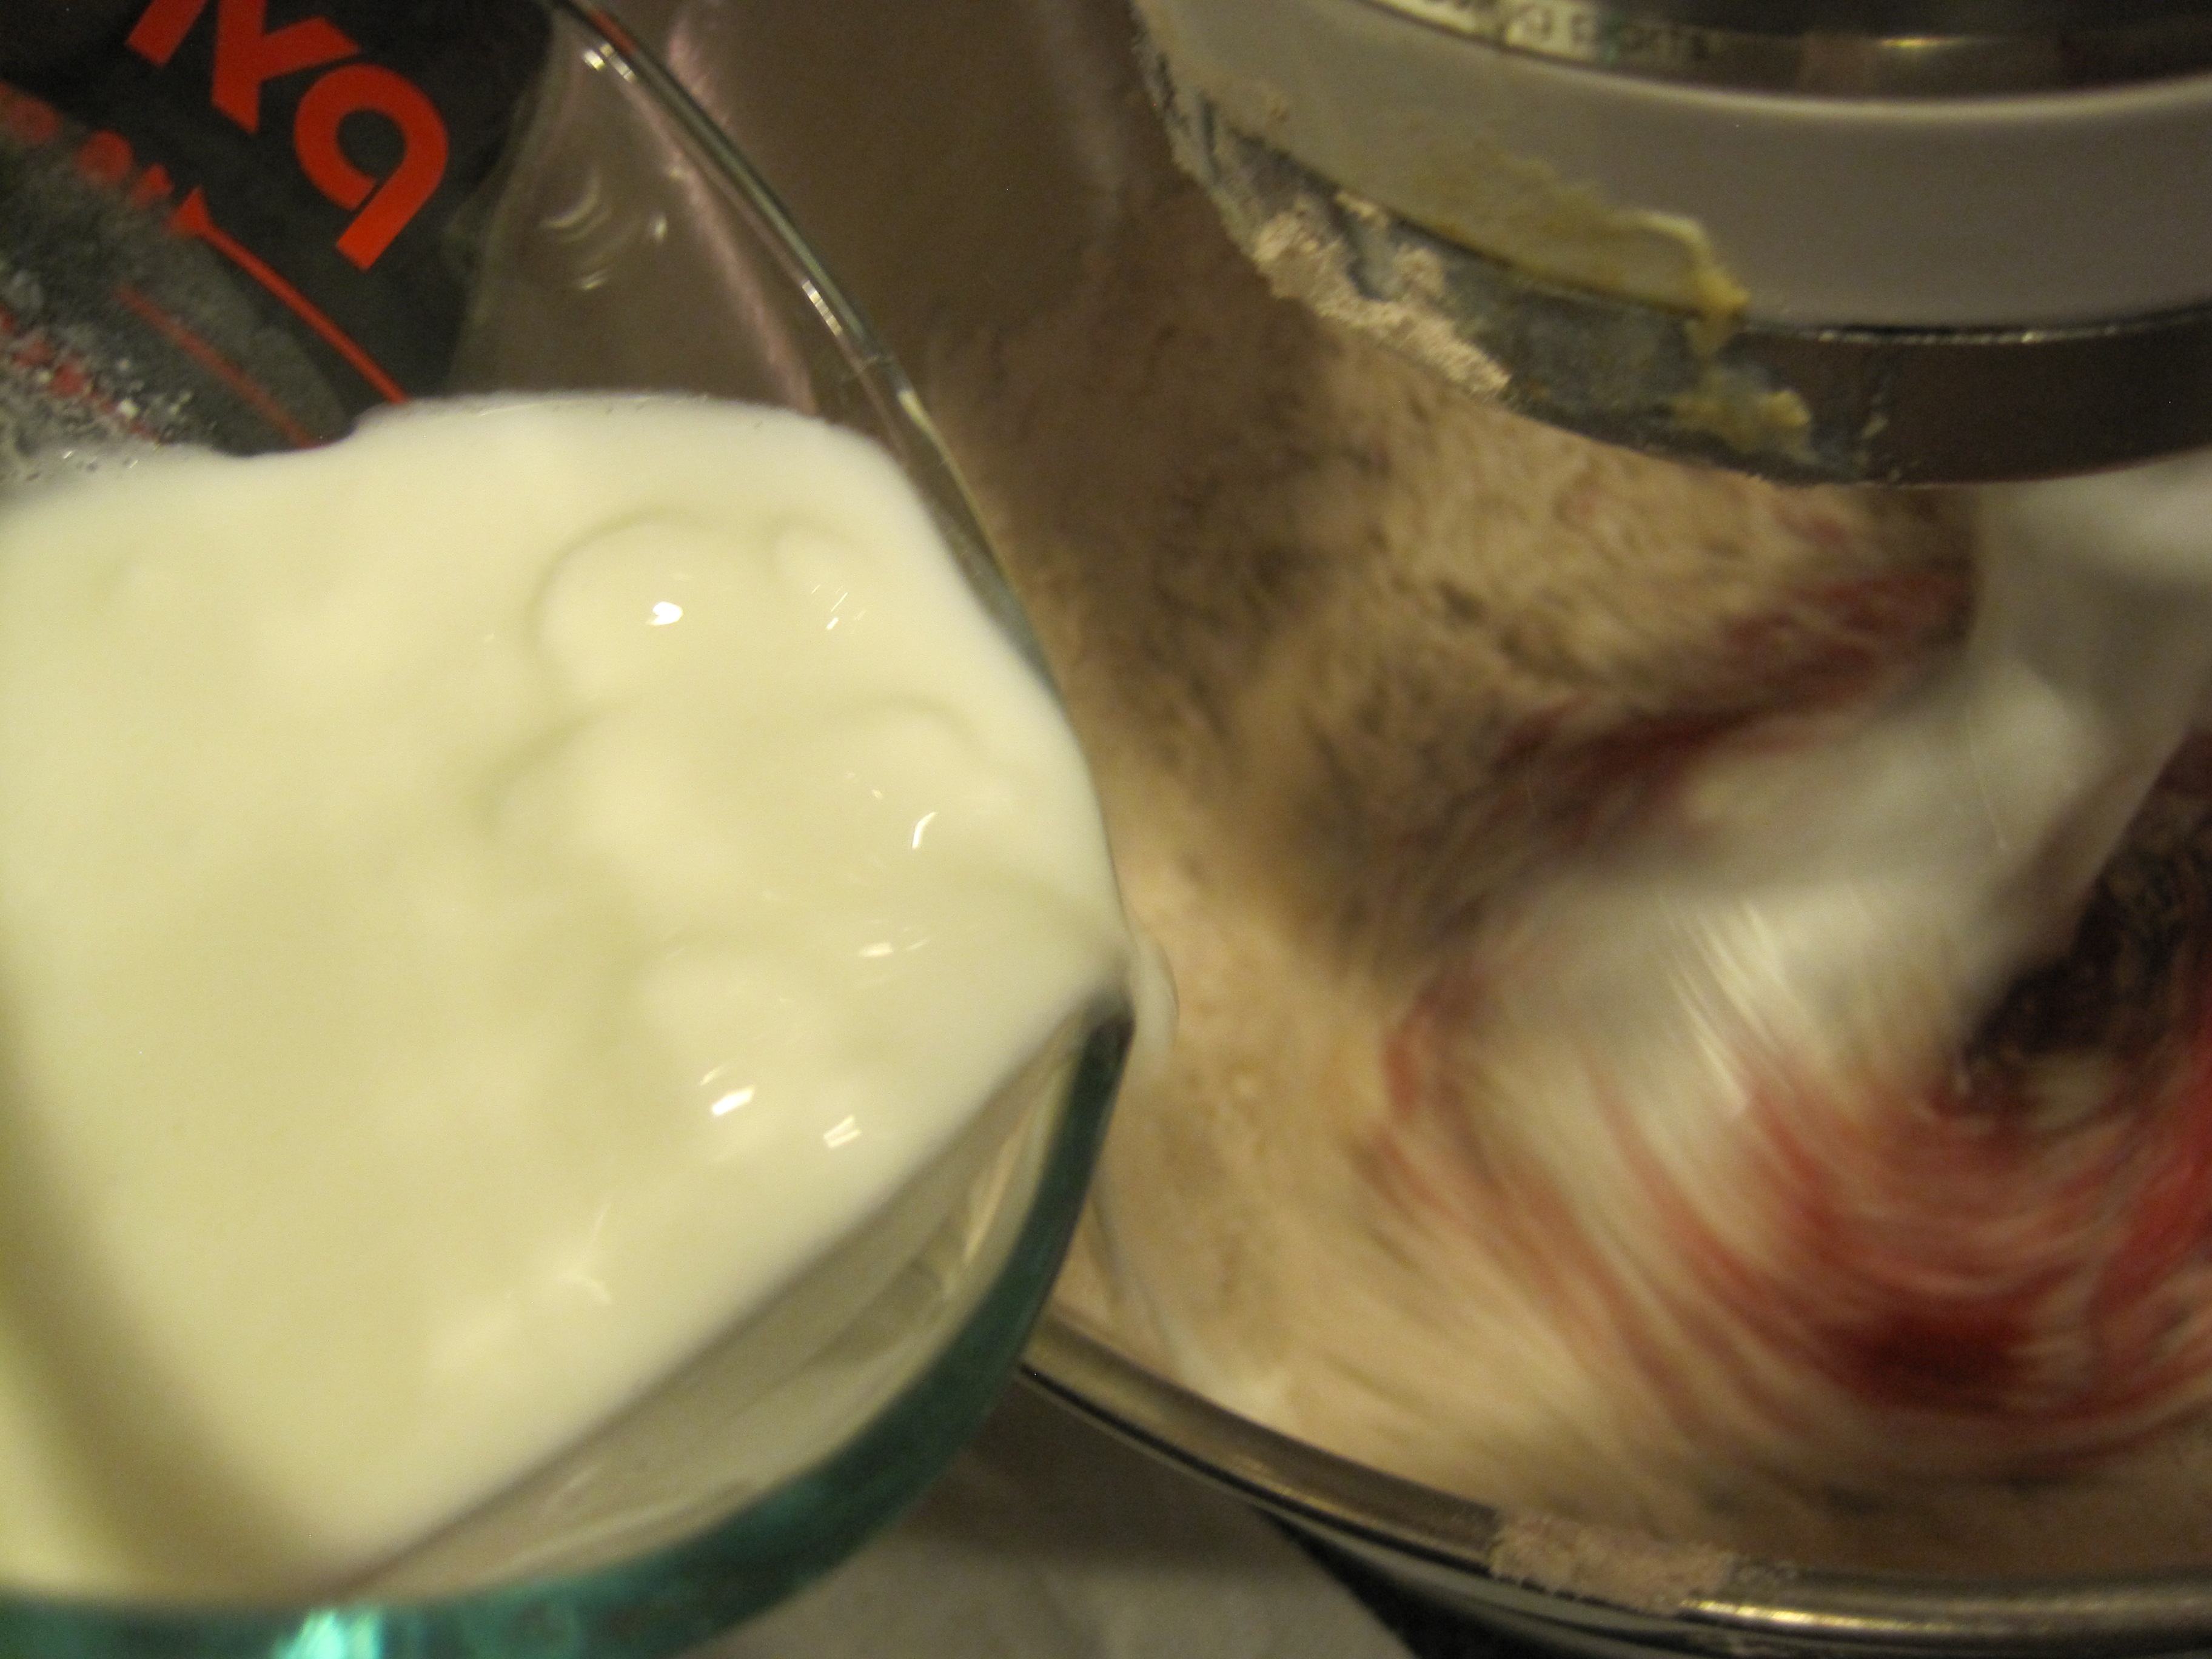
alternate flour and milk. don’t over mix.

IMG_9638

IMG_9639

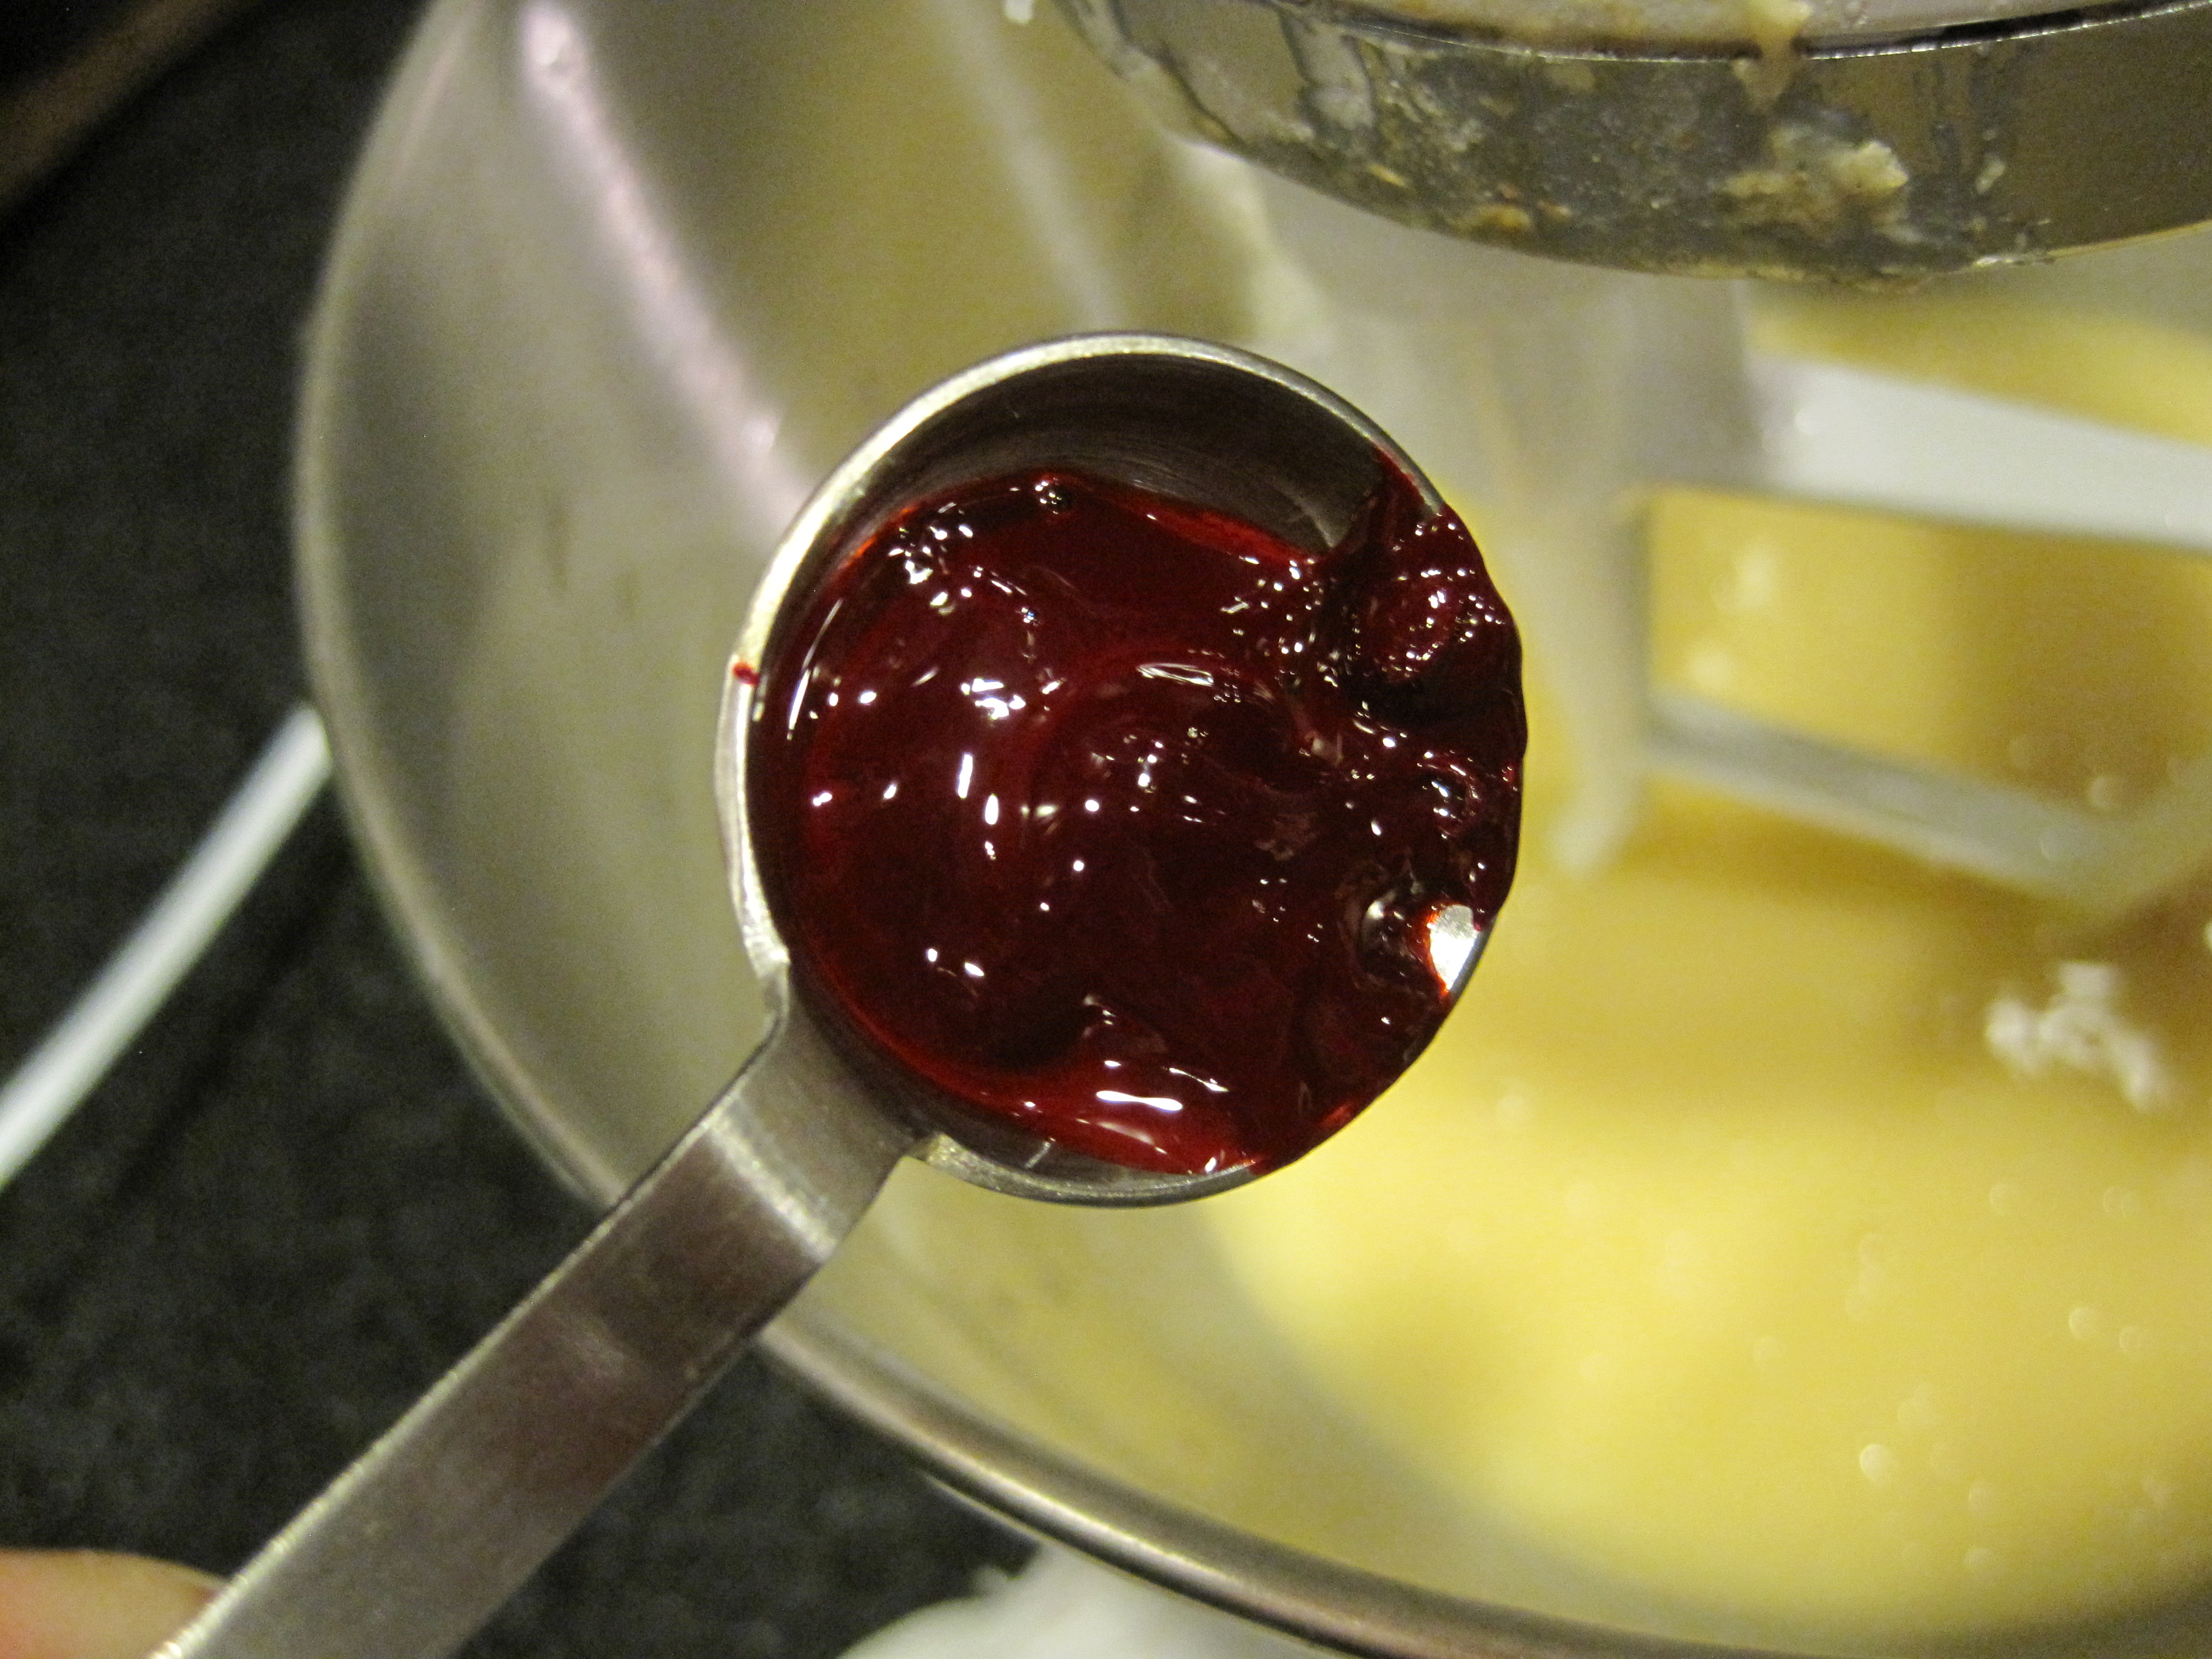
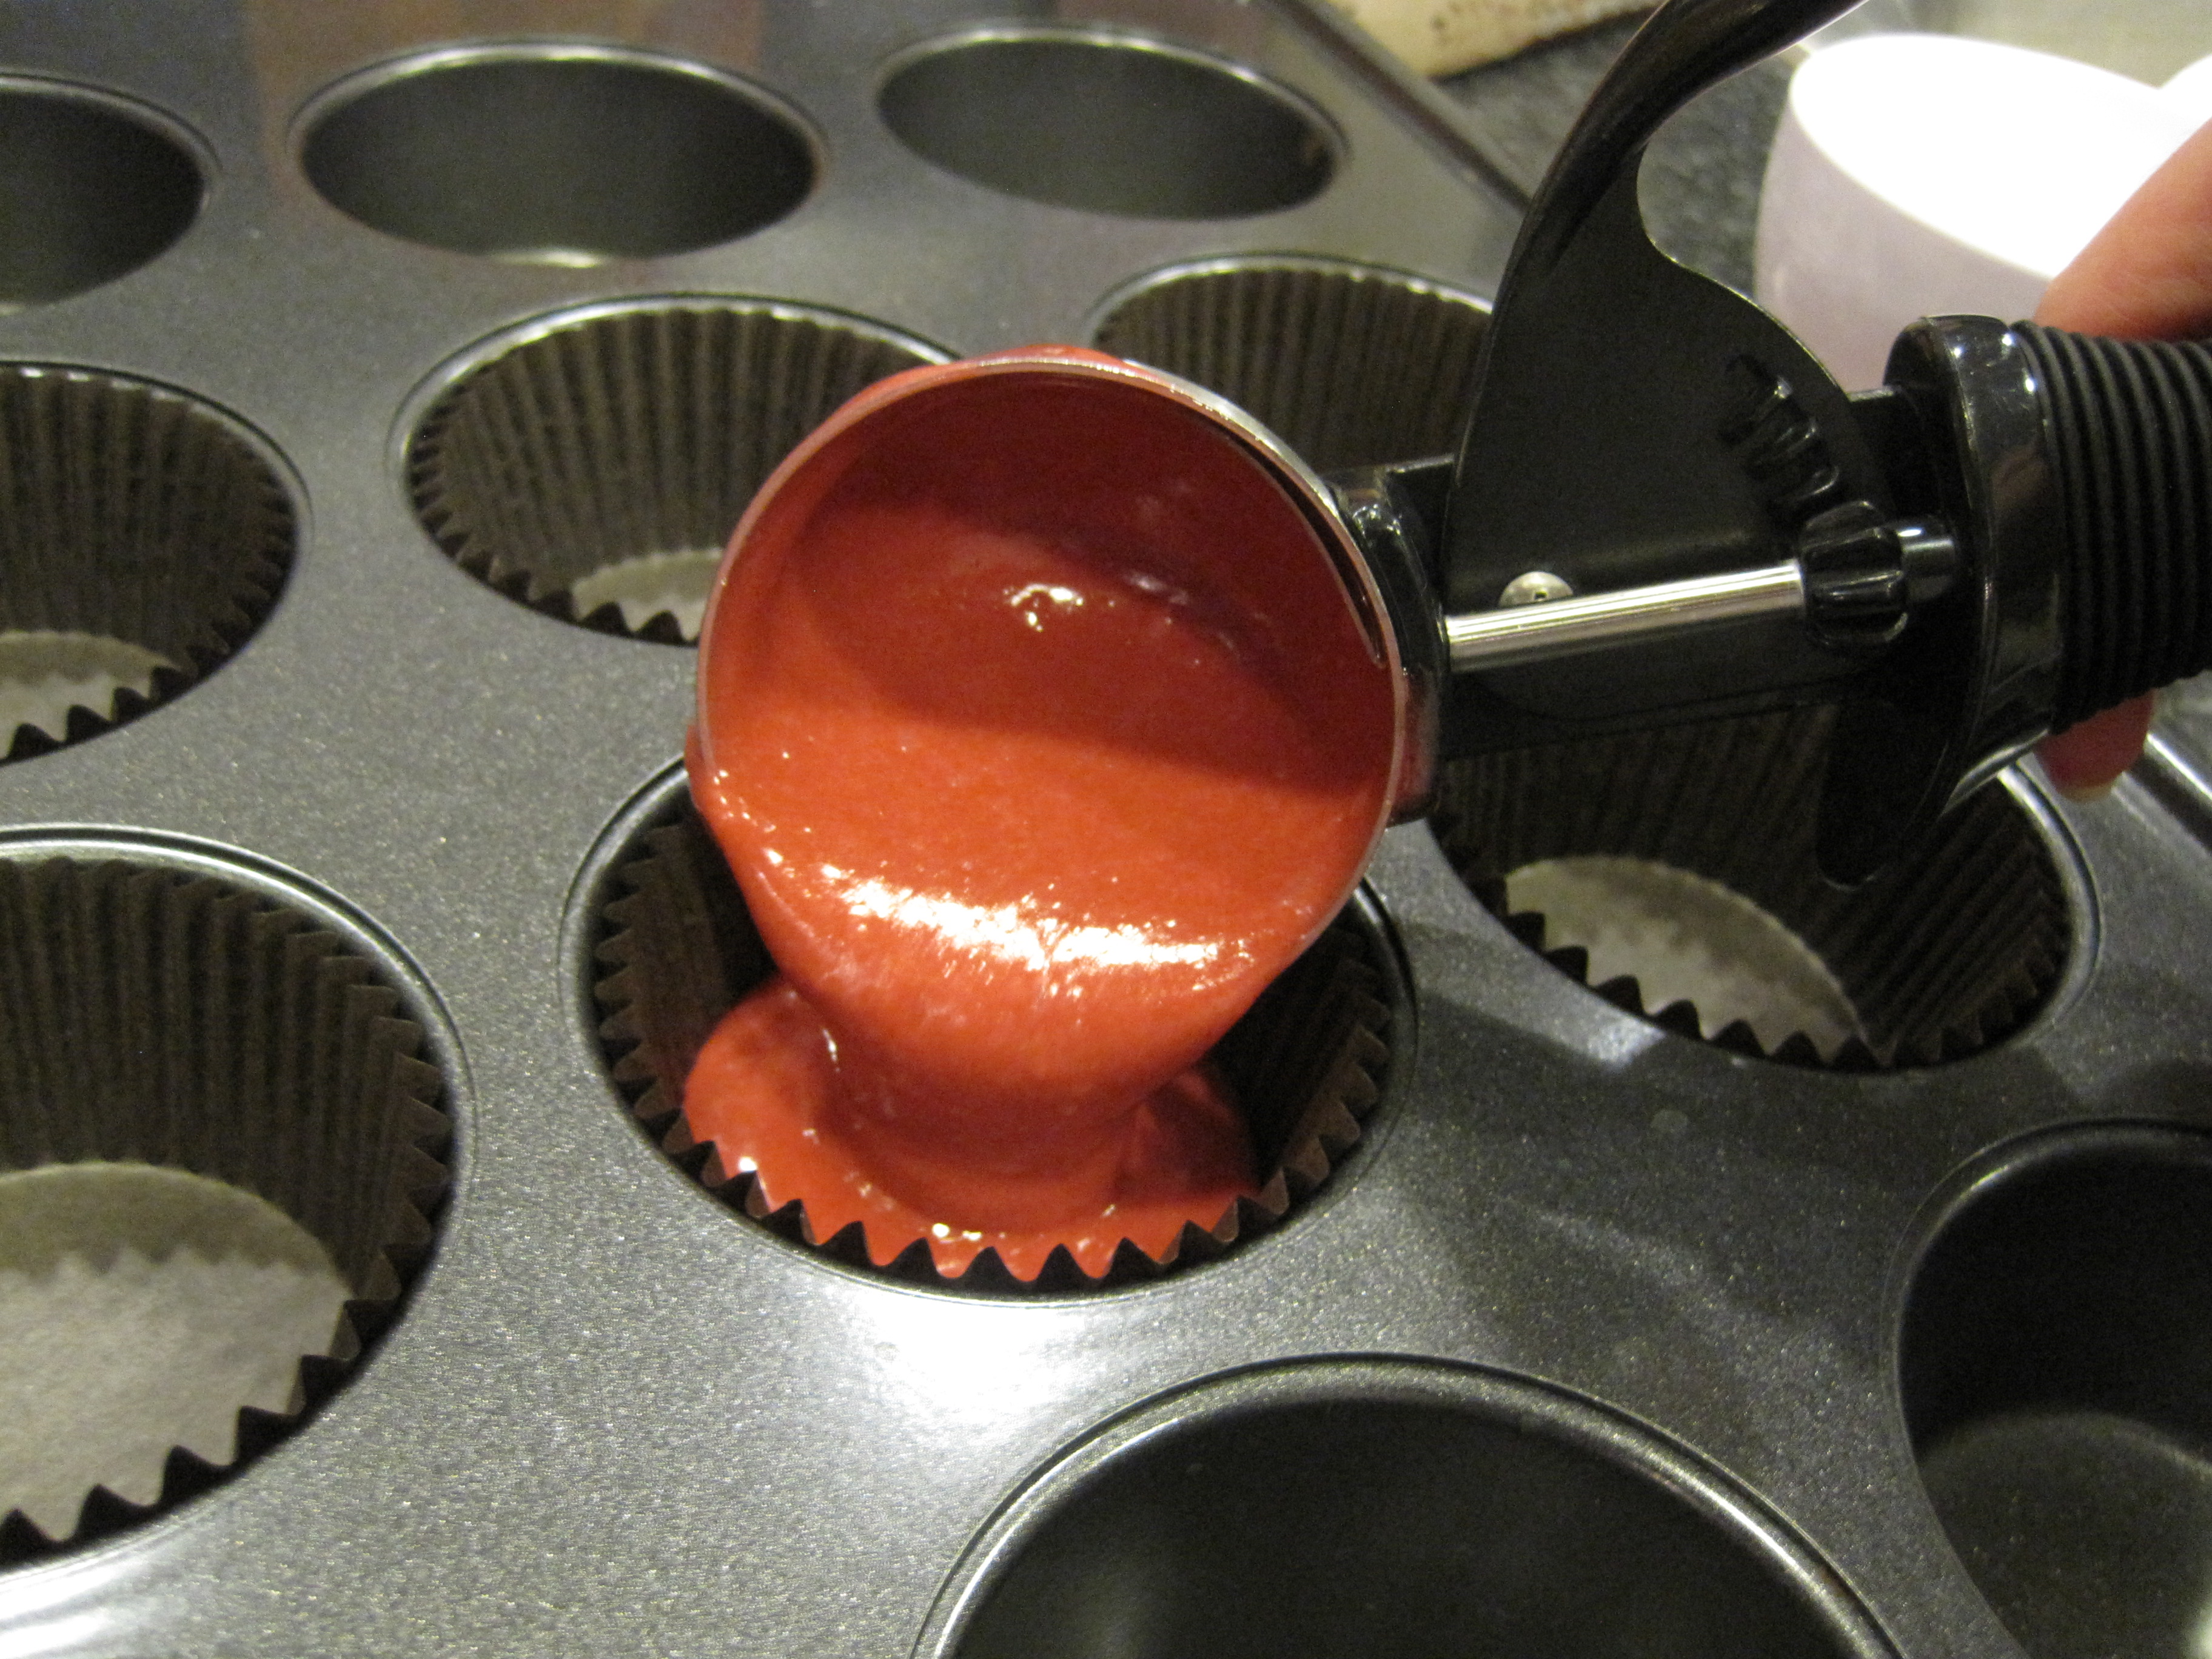
add cooled raspberry swirl to the cake.

IMG_9642

and sprinkle with some sugar.

IMG_9643

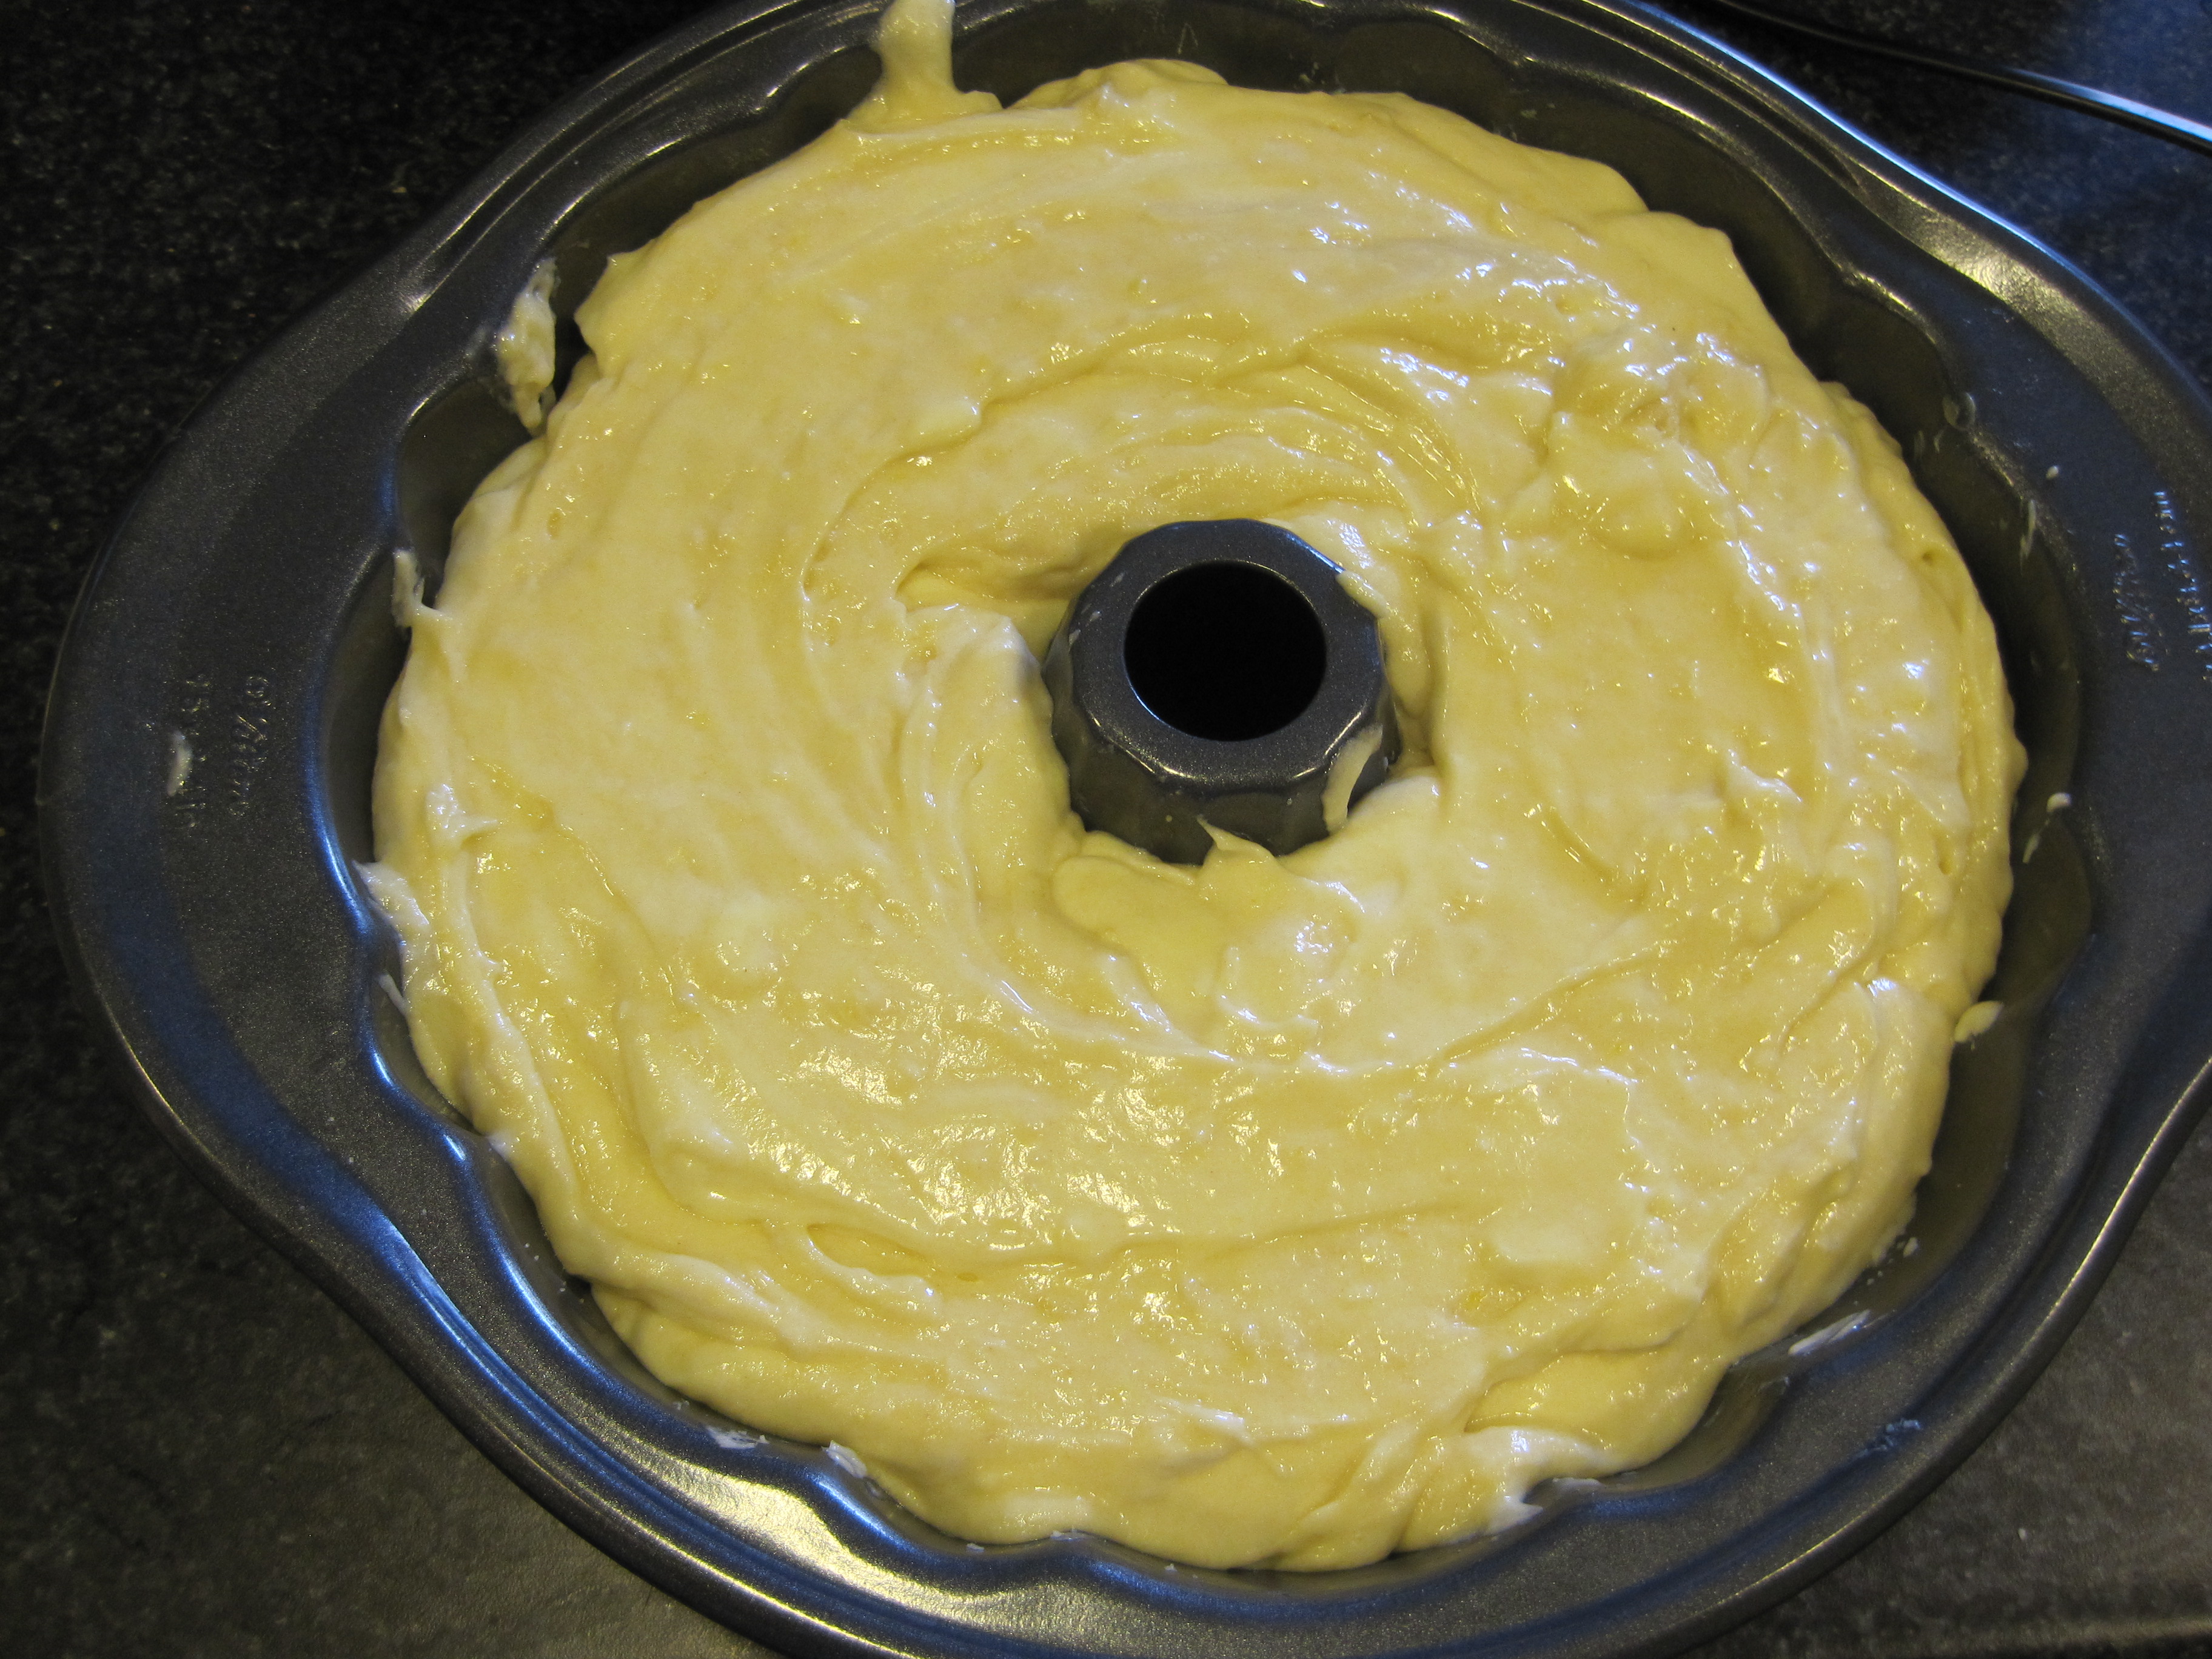
pour the remainder batter onto pan.

IMG_9645
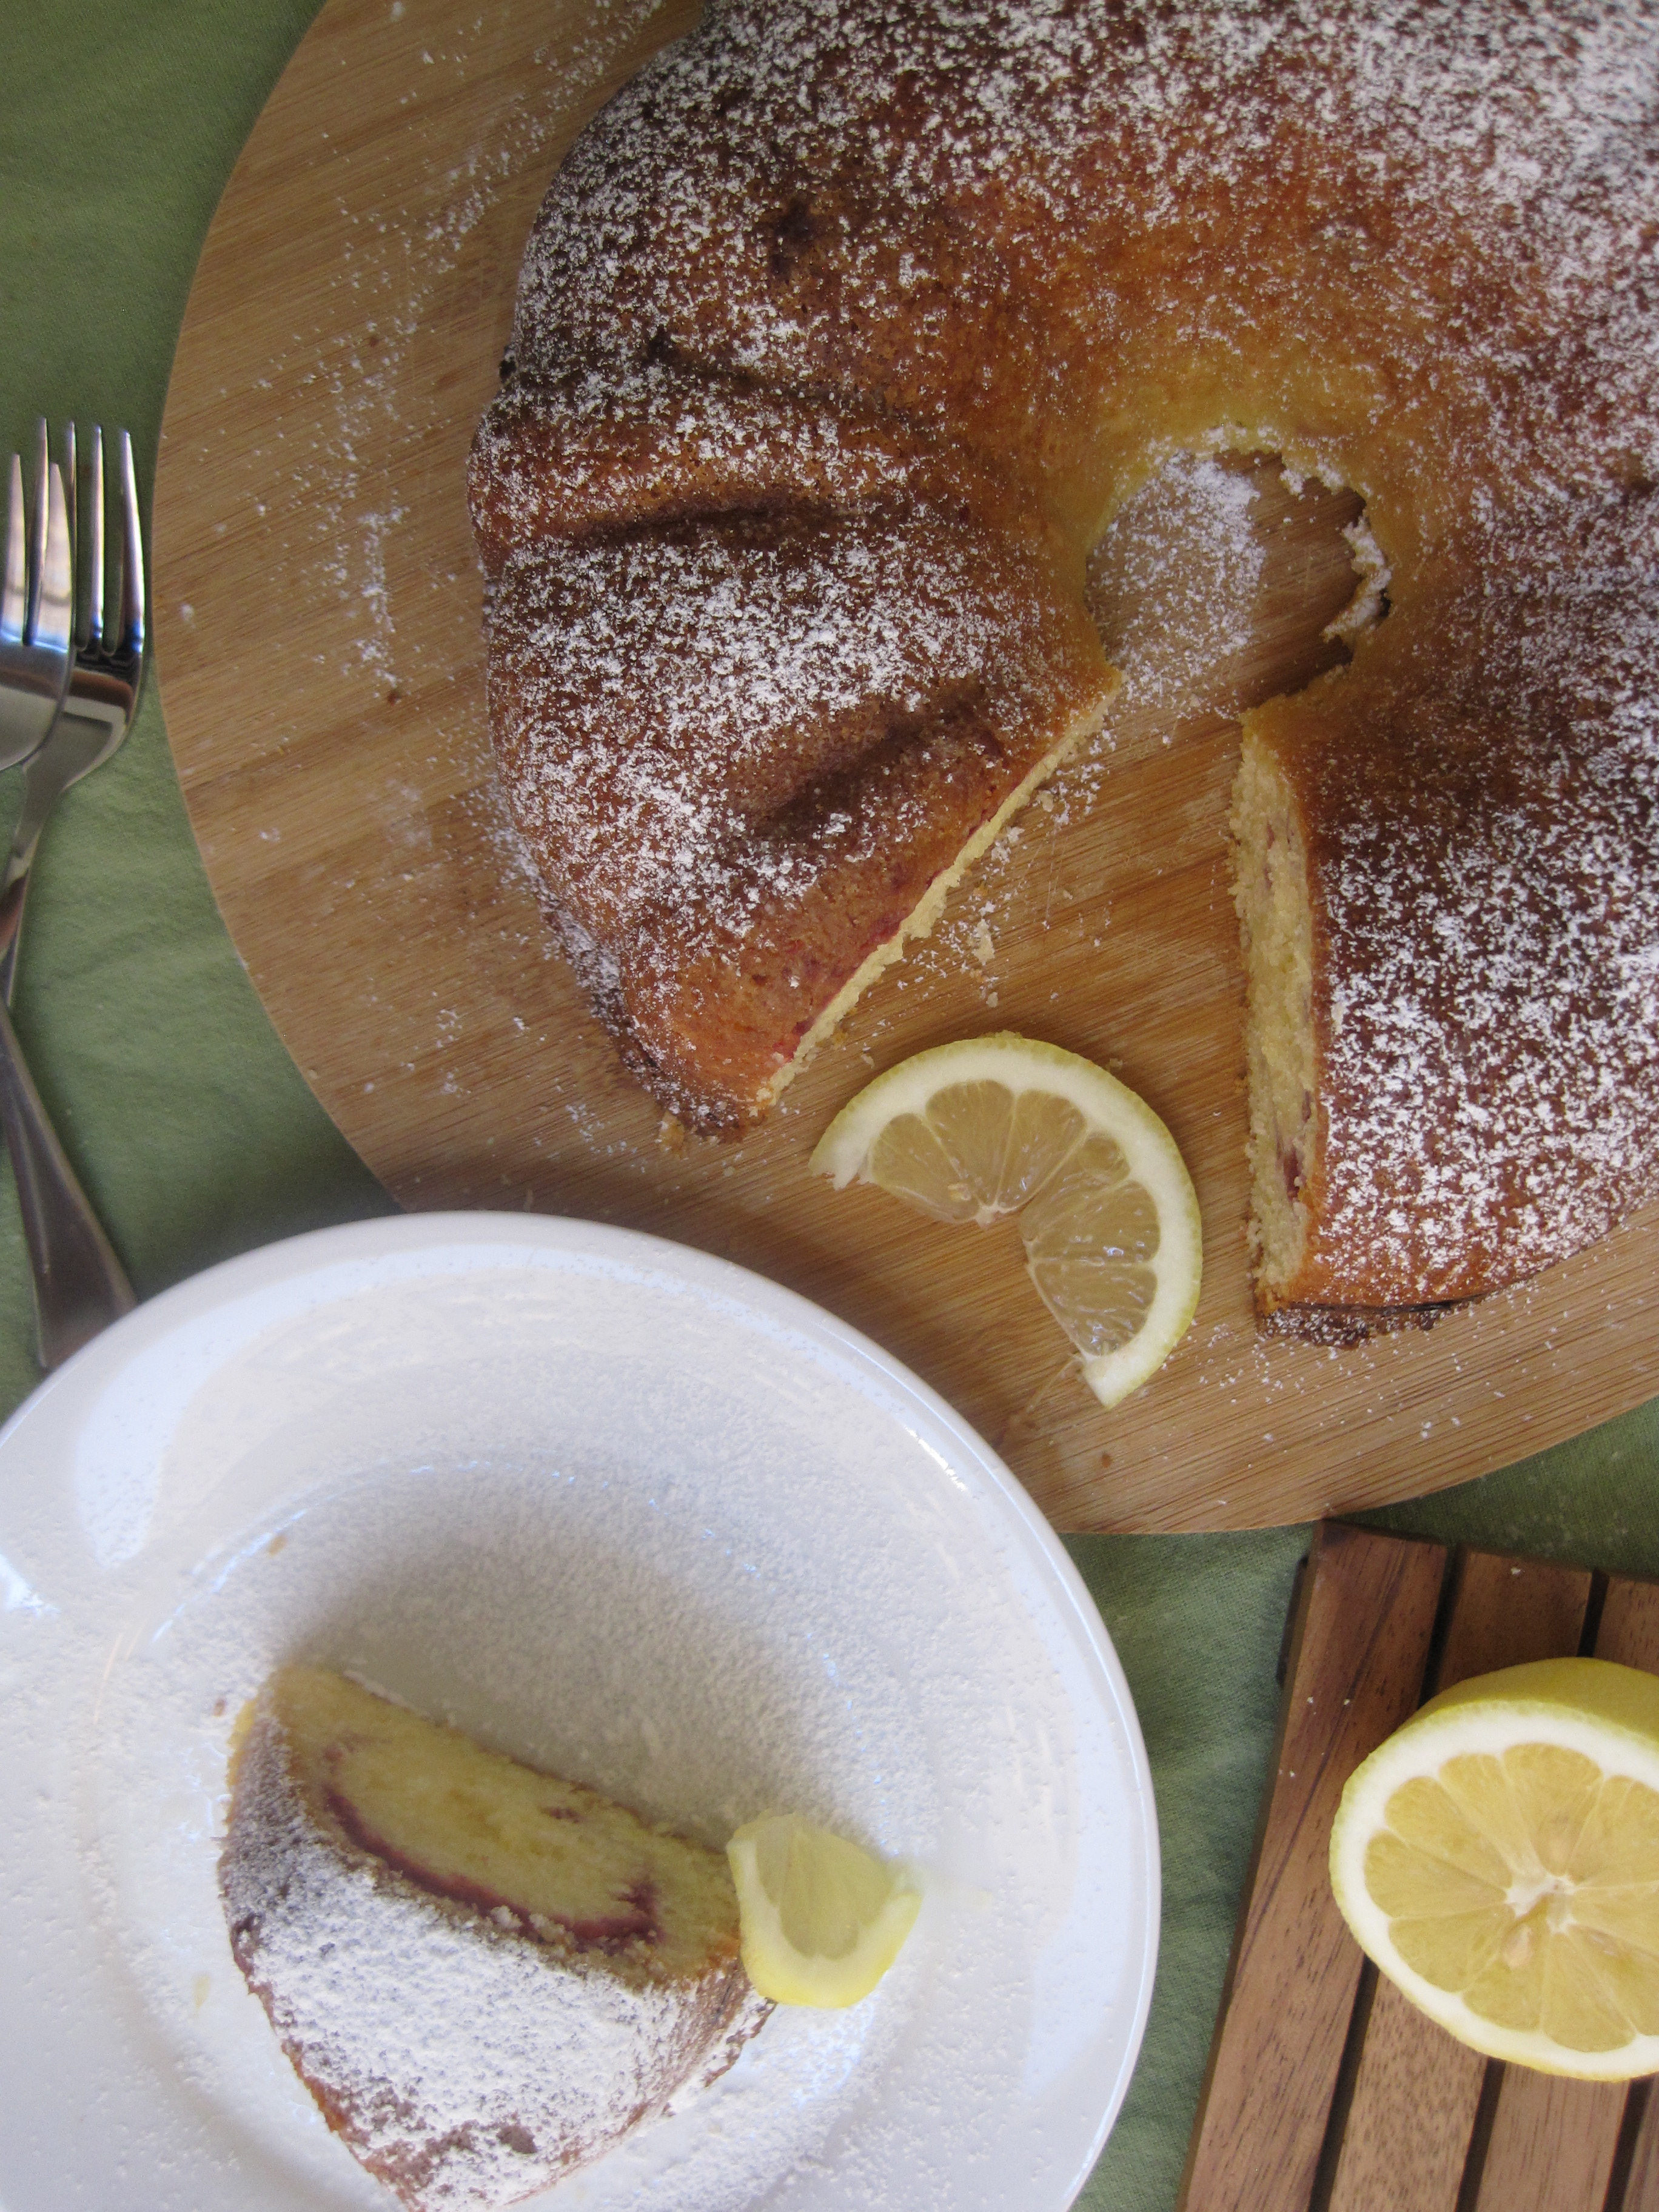
and here’s what the pound cake looks like after cooled and sprinkled with some powdered sugar.

IMG_9683

IMG_9686

IMG_9689

IMG_9690

IMG_9697i needed to taste this pound cake so i took a picture of my almost-gone cake piece to show you the flavorful raspberry swirl.

IMG_9711

IMG_9722

IMG_9725

IMG_9730

IMG_9746

favorite raspberry swirl lemon pound cake

ingredients:
zest of two large lemons
2 and 1/2 cups sugar
3 cups unbleached all purpose flour
2 and 1/2 teaspoons baking powder
1/2 teaspoon sea salt
One 8 ounce package cream cheese, room temperature {about 1 hour sitting on the kitchen counter}
2 and 1/2 sticks unsalted butter, melted and cooled
6 large eggs, room temperature {about 1 hour sitting on the kitchen counter}
2 teaspoons vanilla extract
1/2 cup whole milk, room temperature {about 1 hour sitting on the kitchen counter}
powdered sugar for garnish {optional}

raspberry swirl
1 and 1/2 cup raspberries {fresh or thawed if frozen}
2 tablespoons and 1 teaspoon sugar, divided
1/2 teaspoon cornstarch
1/4 cup water

yields 1 standard pound {bundt} cake.

directions:

  1. in a large bowl mix sugar and lemon zest together with a fork. press fork against sugar and lemon zest to release the oils from the lemon zest. you want to do this until fragrant, about 3 minutes or so.
  2. make the raspberry swirl. in a saucepan over medium heat combine all ingredients with the exception of the 1 teaspoon of sugar and stir occasionally. softly mash the raspberries with a fork and cook until thickens, about 5 minutes. take off of burner and let it cool in the pan.
  3. preheat oven to 350F. butter a bundt cake pan. set aside.
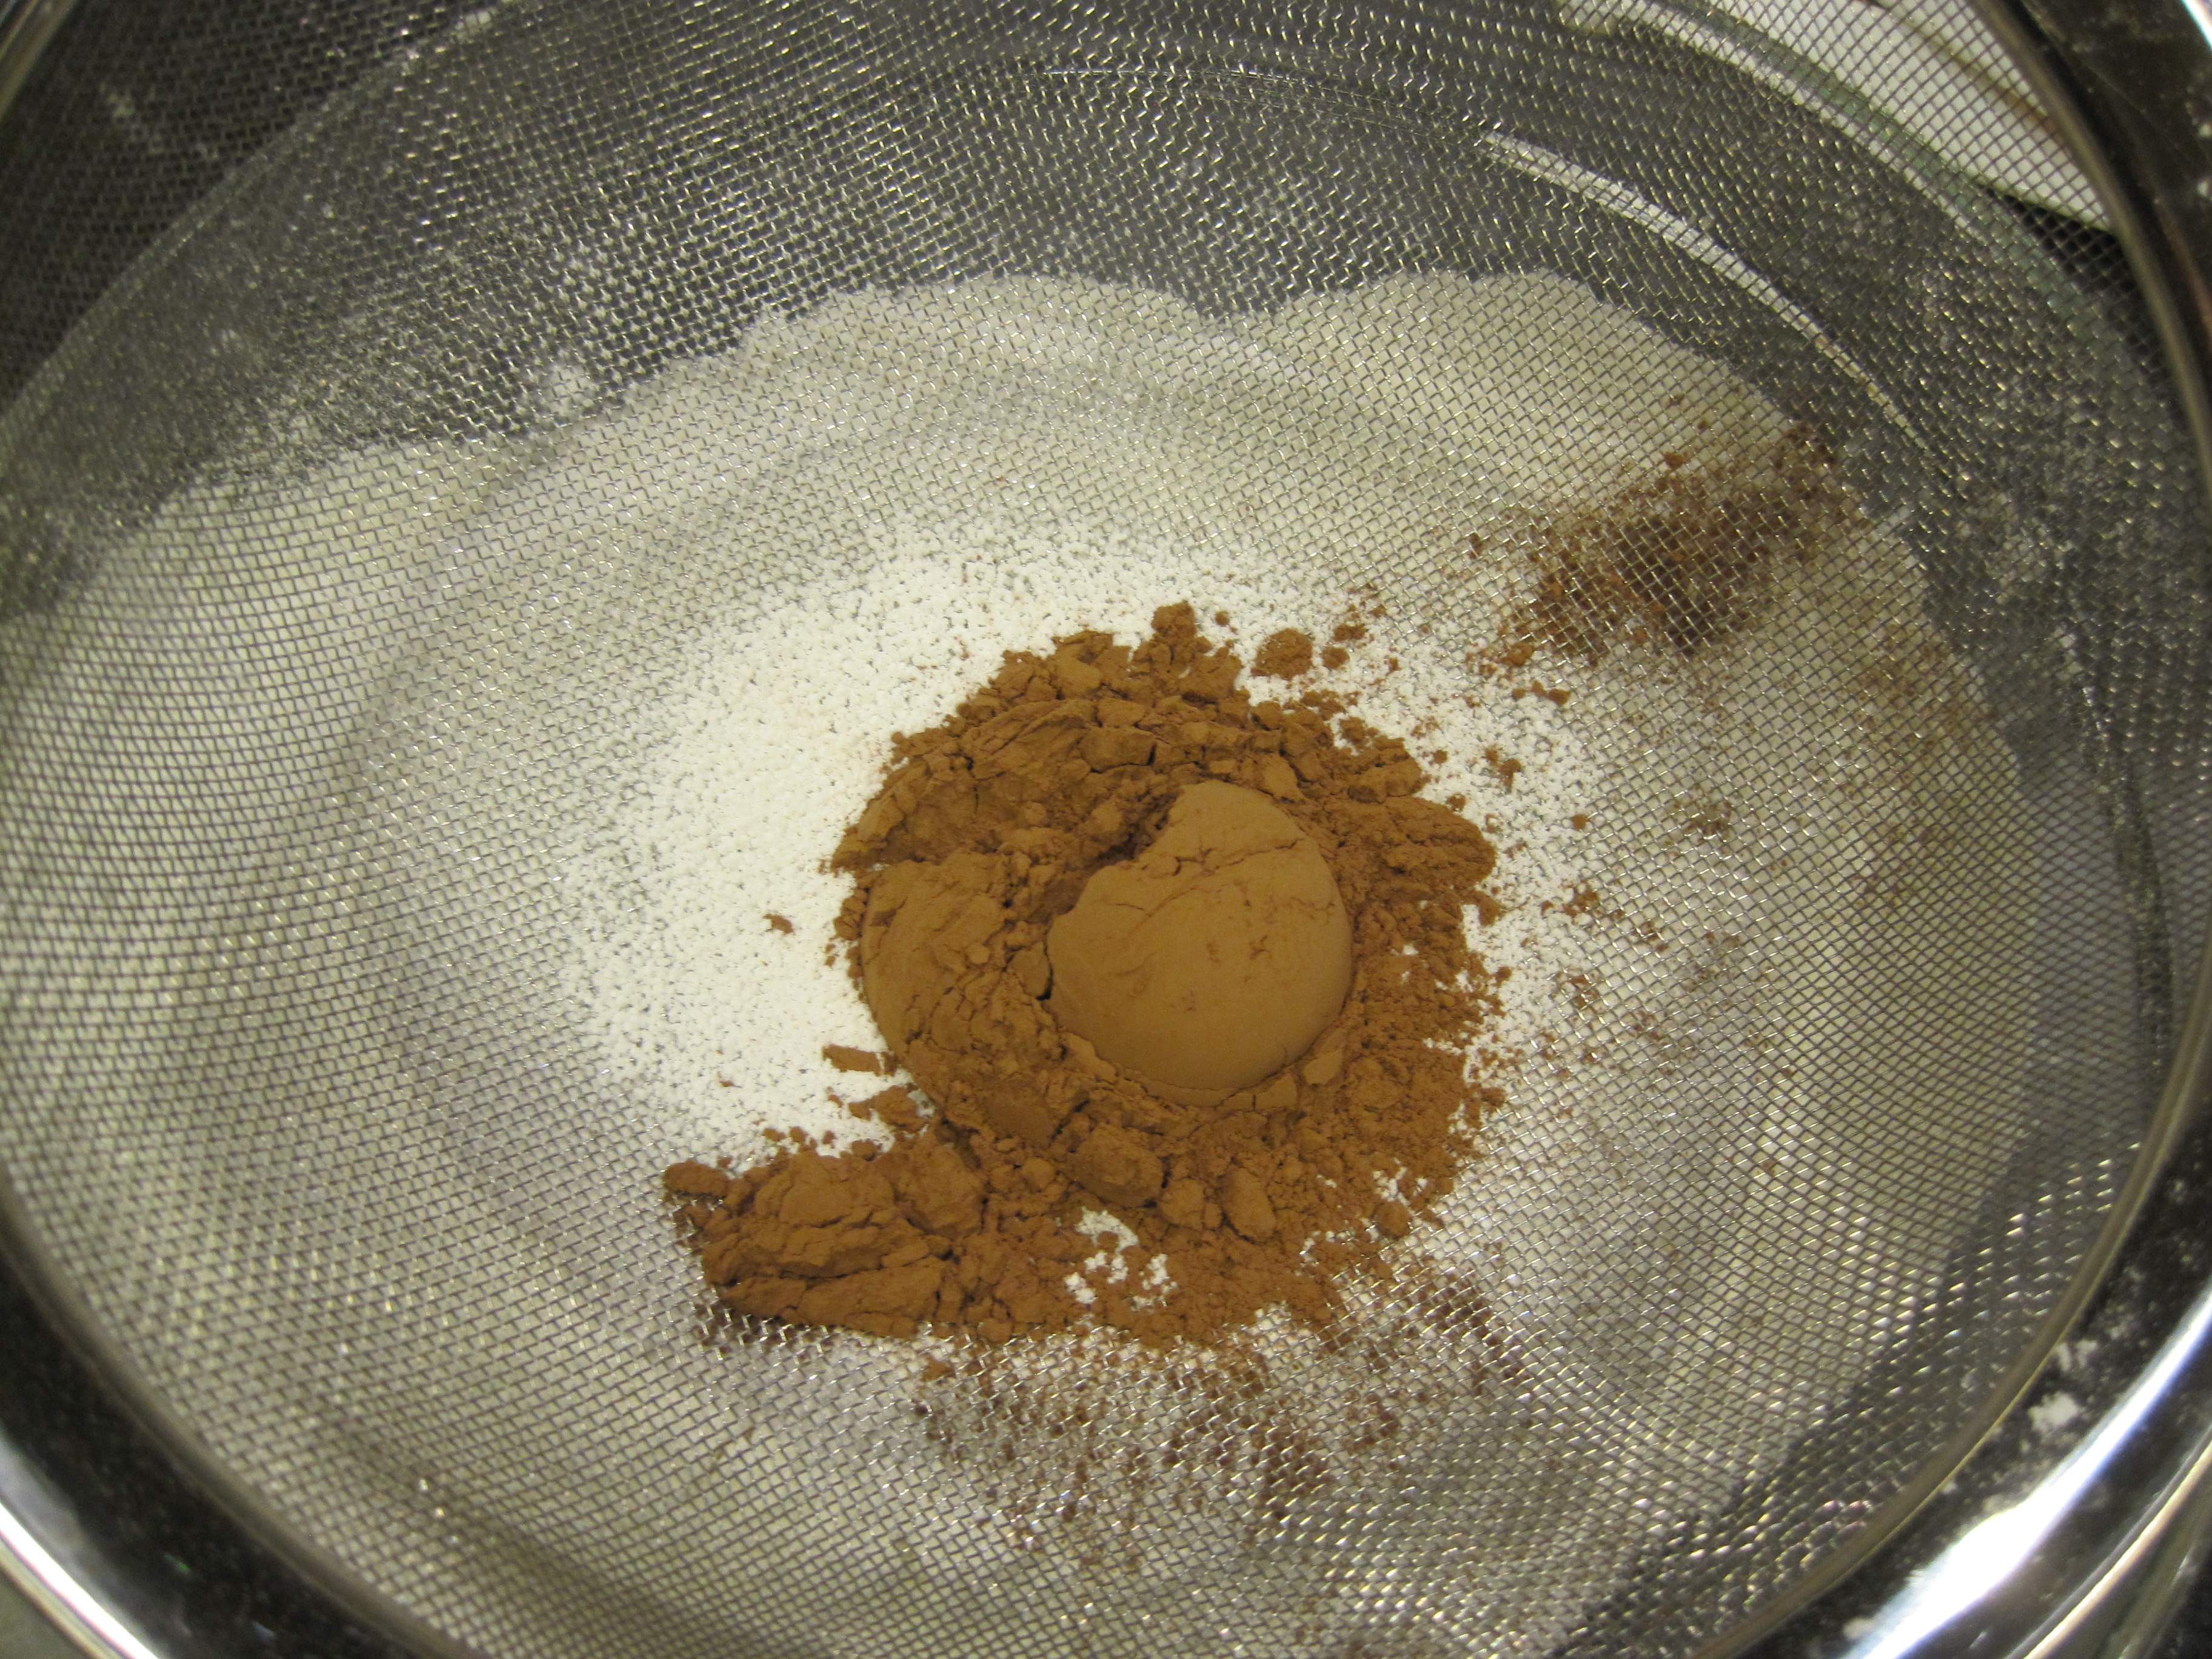
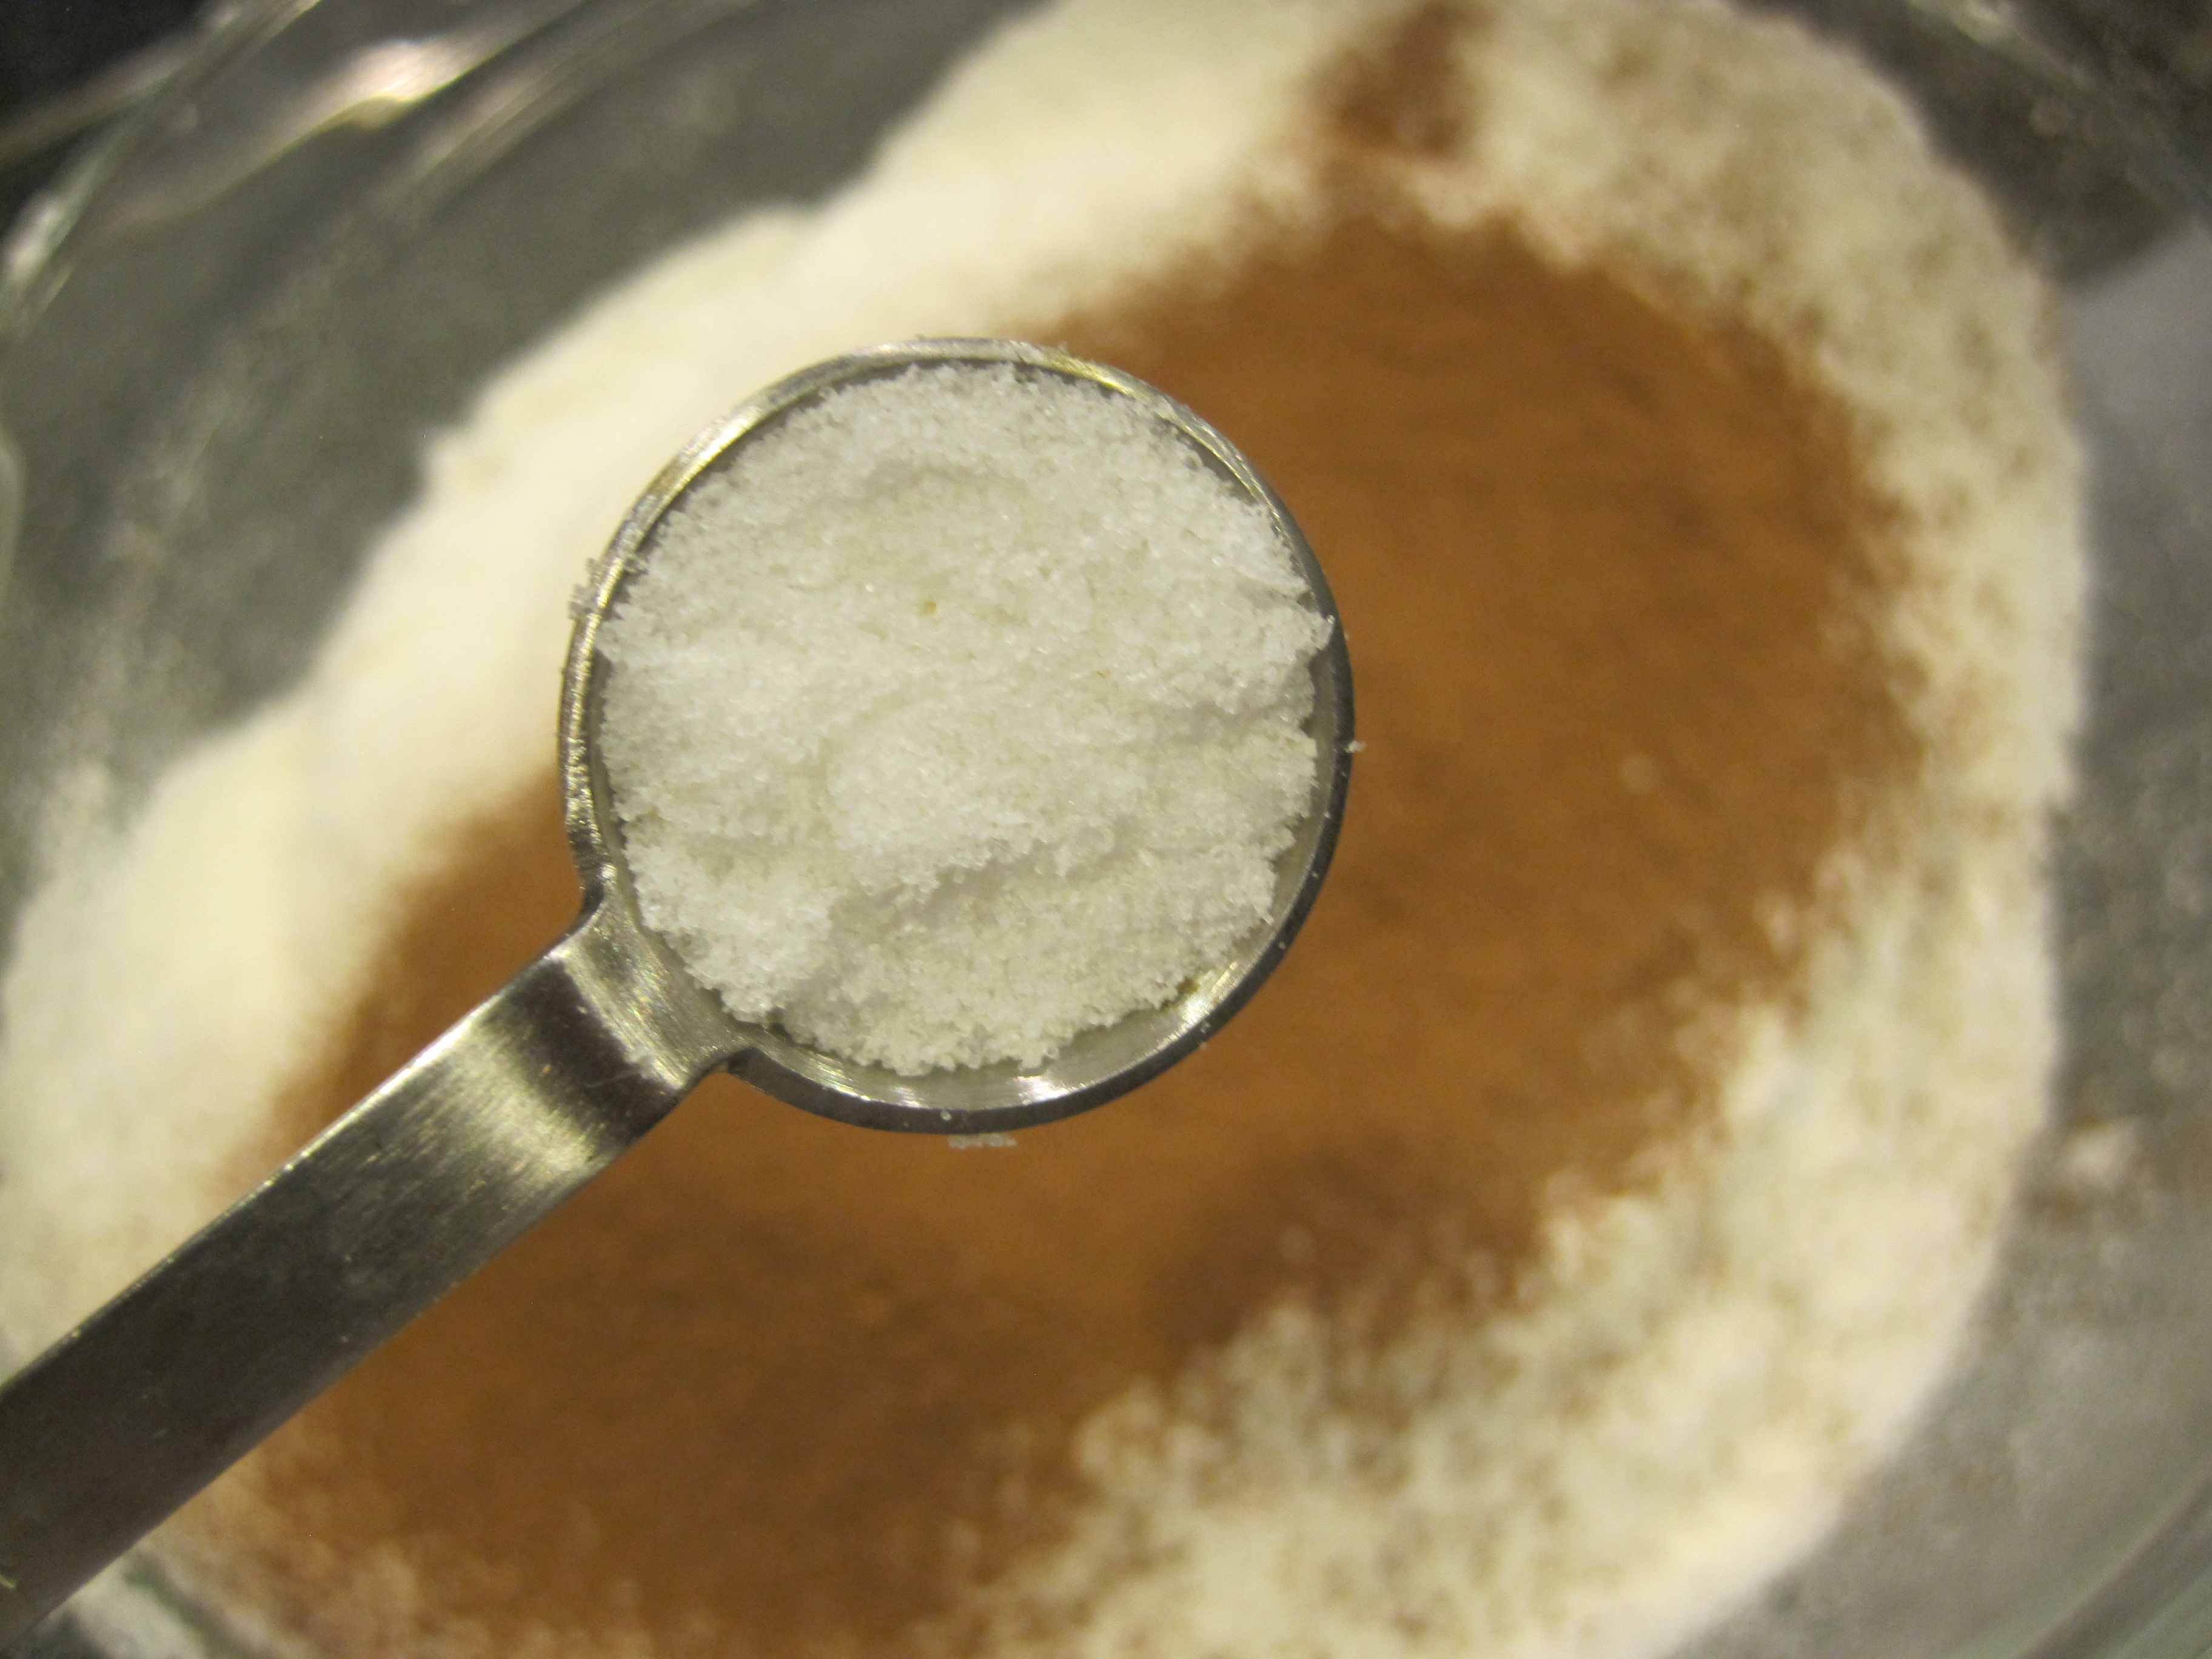
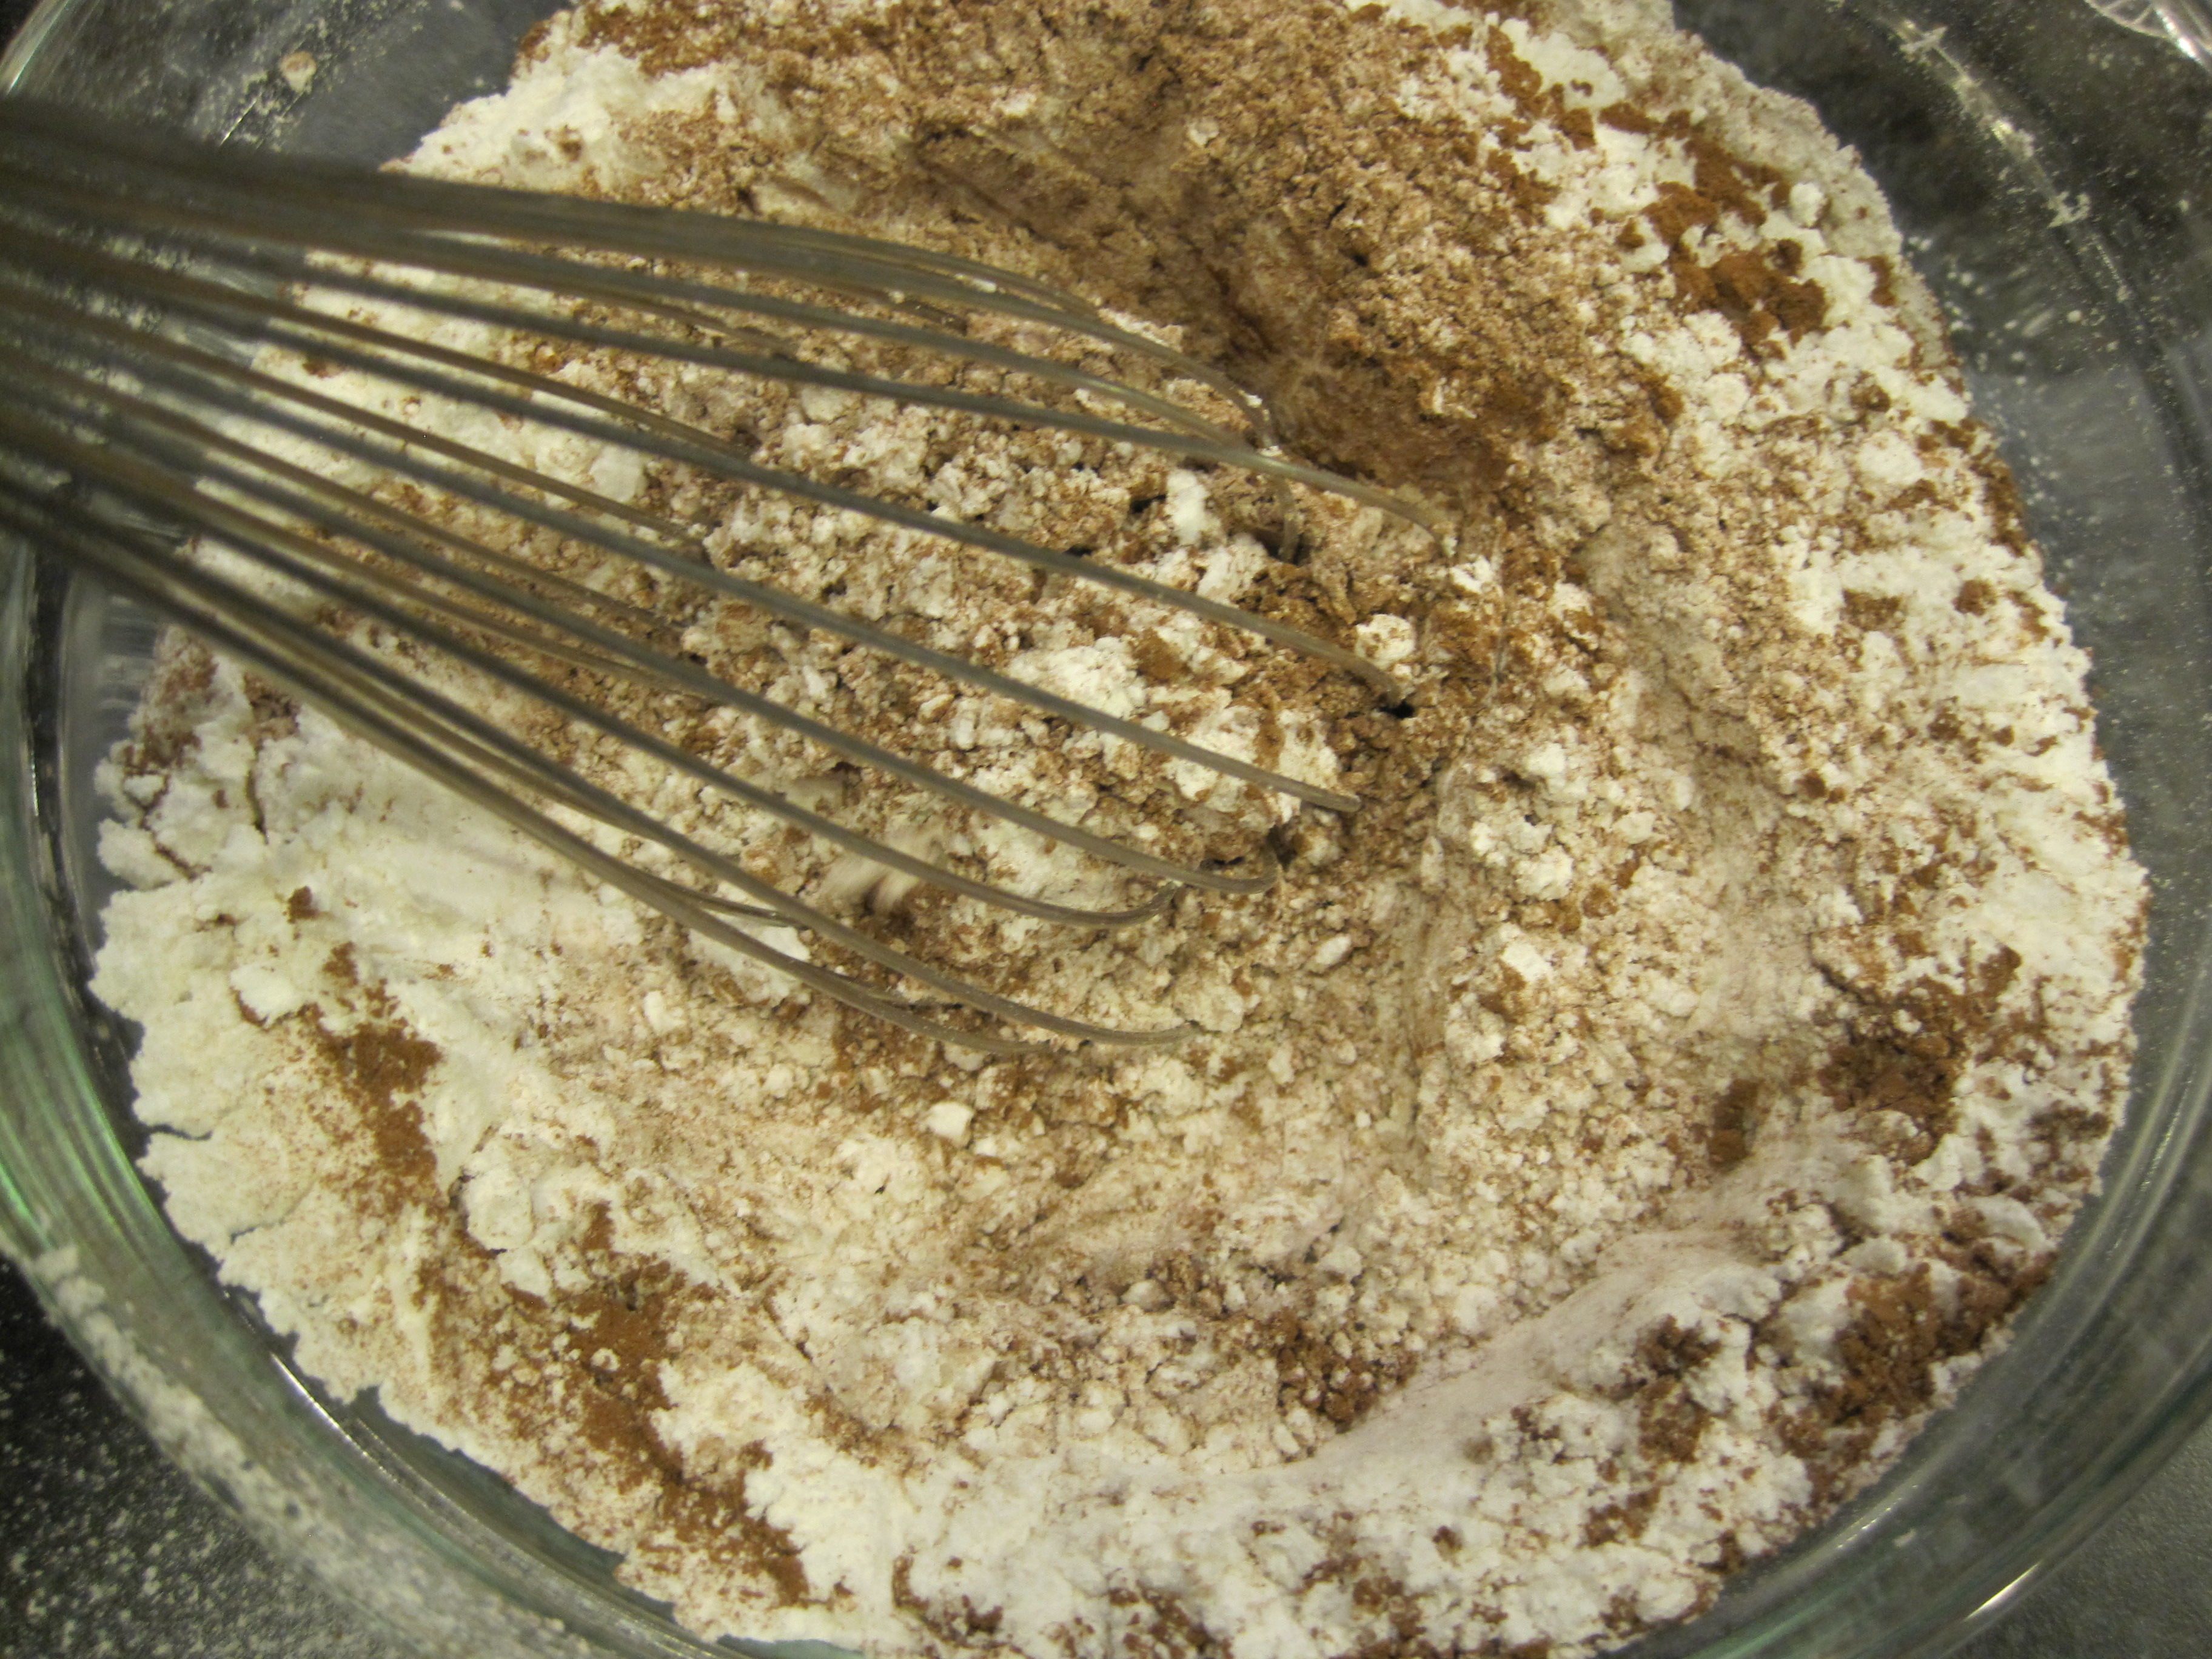
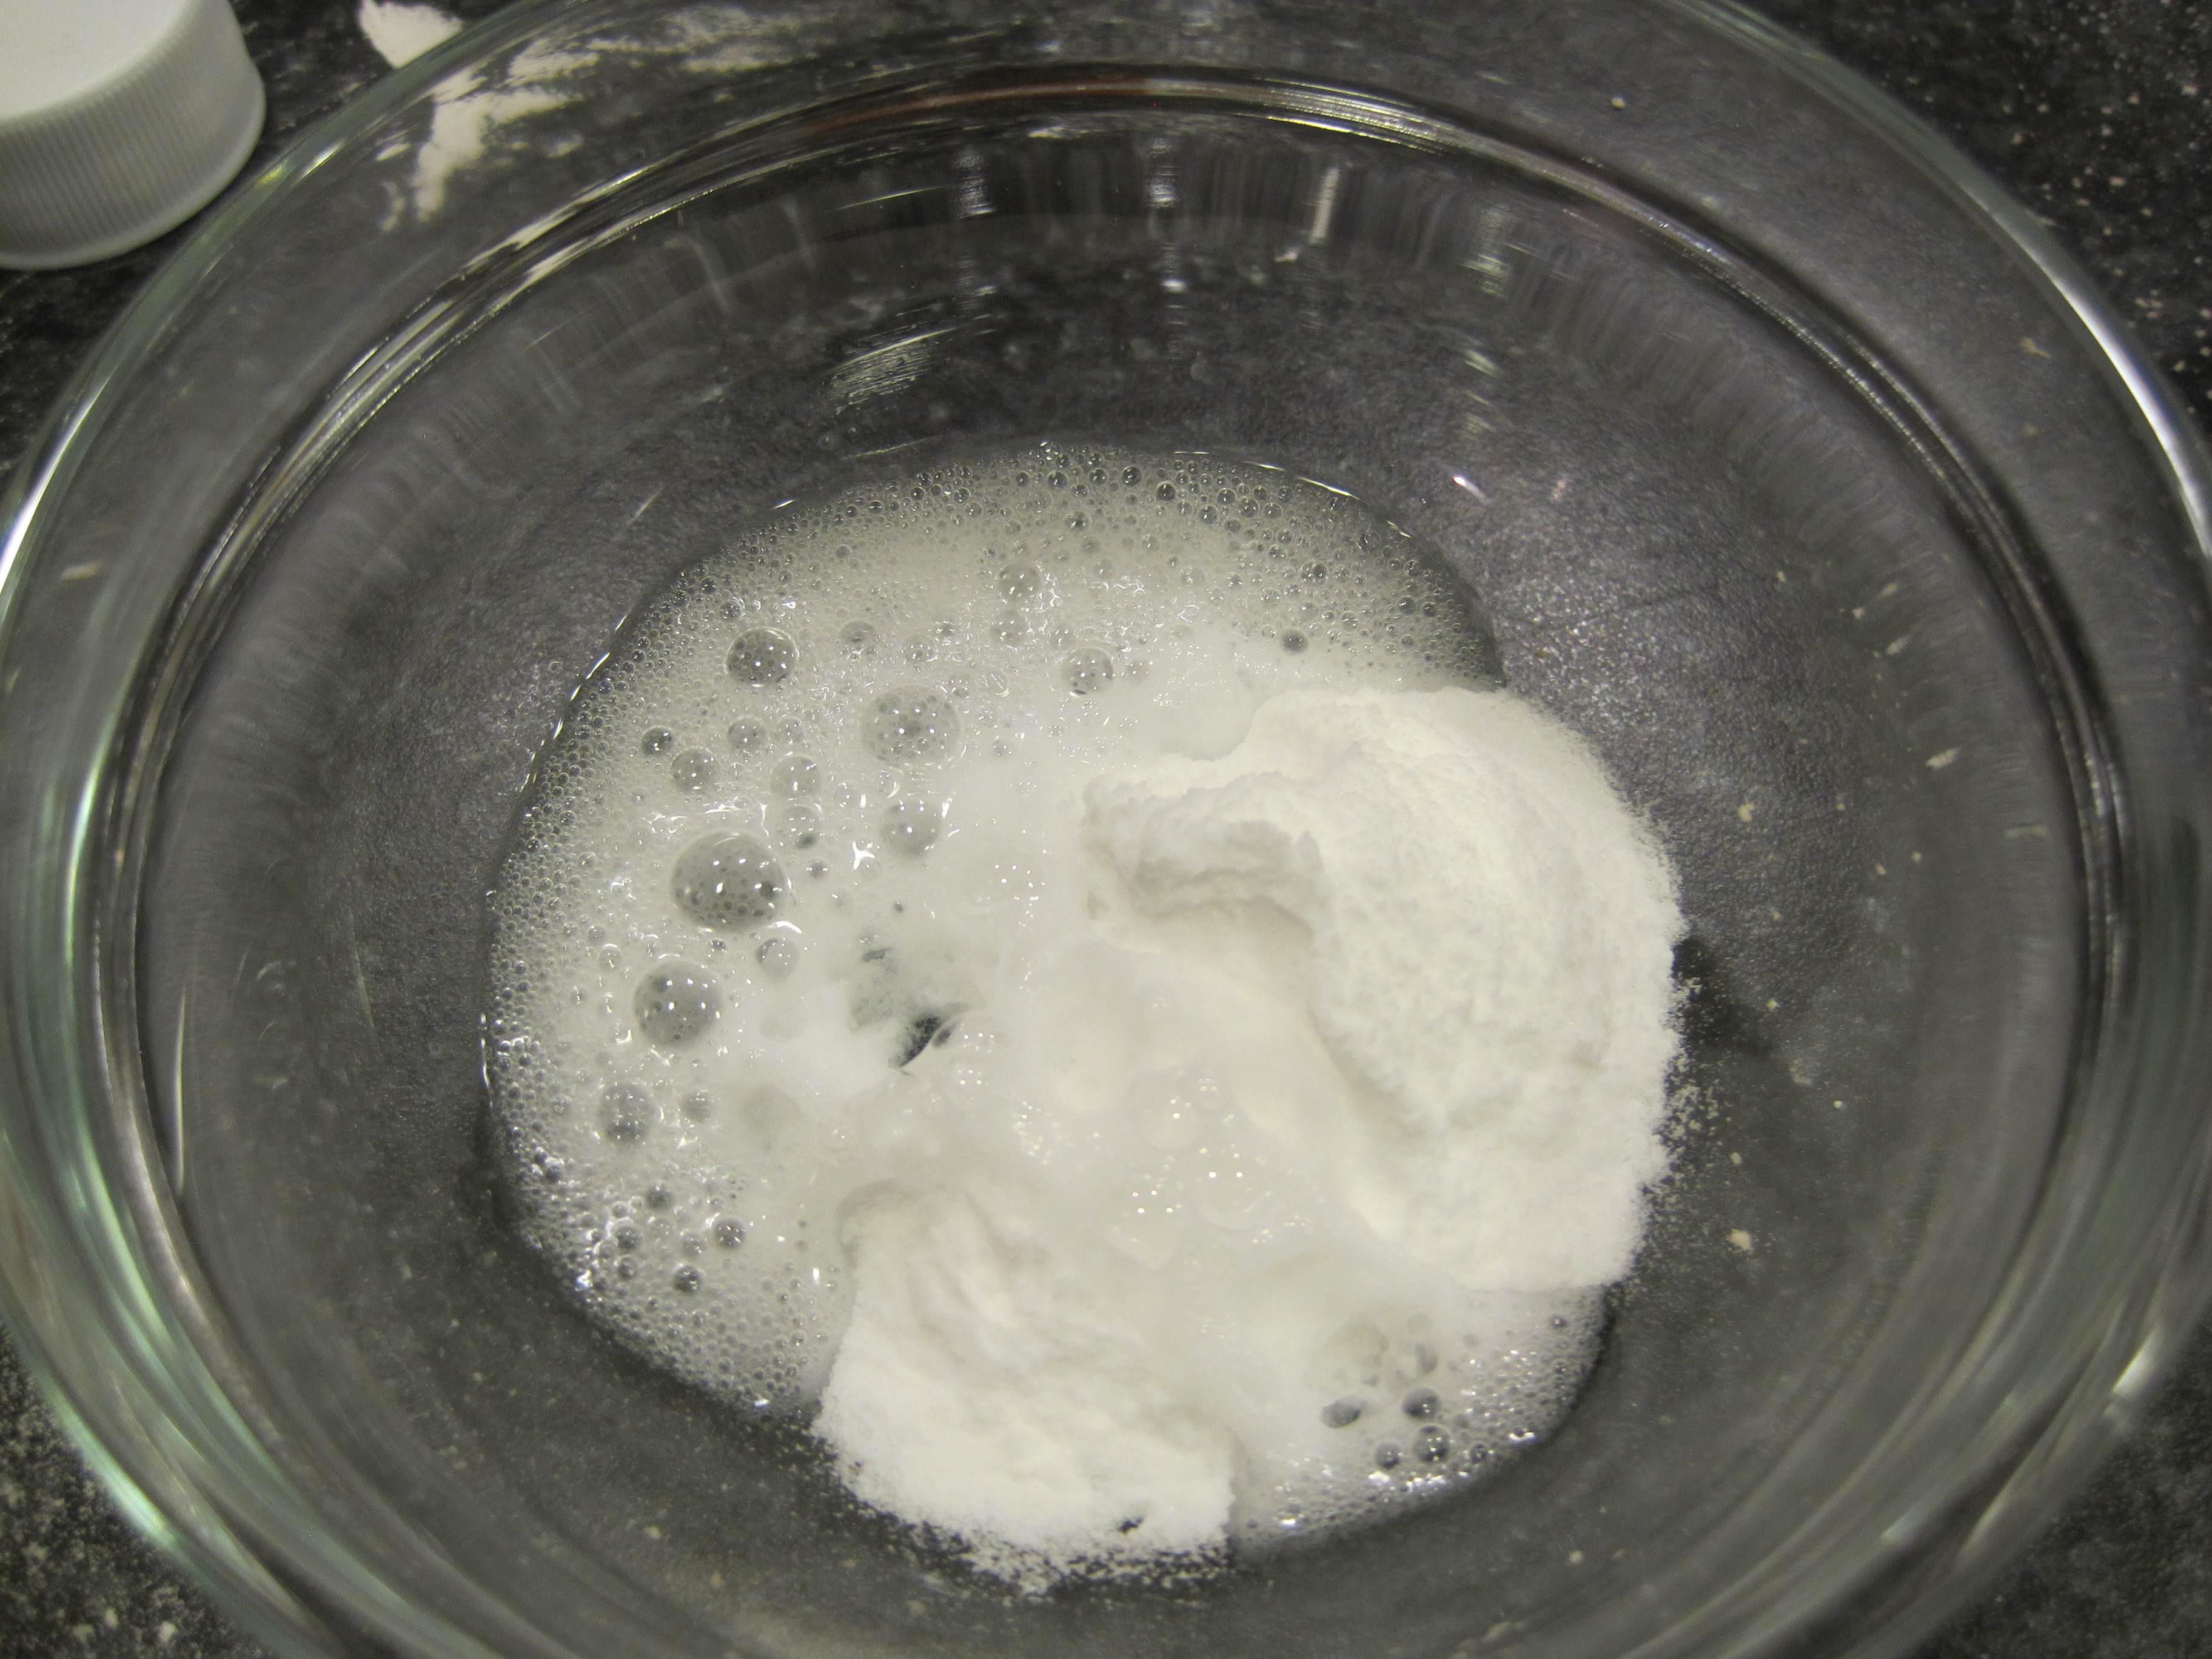
  4. in a large bowl, sift flour and baking powder. add sea salt and mix well.
  5. in a bowl of a stand mixer, beat cream cheese over medium-high speed {speed #6 in a kitchenaid} for 2 minutes until fluffy. stop mixer, add melted butter and sugar mixture and beat until fluffy and creamy over medium-high speed, about 1 and 1/2 minutes.
  6. reduce speed to medium {speed #5 in a kitchenaid} and add eggs one a at time mixing well after each addition. follow by vanilla extract.
  7. set speed to the lowest setting and alternate flour mixture with milk in three additions. make sure to start and finish with flour. do not over mix.
  8. pour half of the batter into prepared pan smoothing it out with a rubber spatula. make an indentation with the spatula and add raspberry mixture. sprinkle with 1 teaspoon of sugar. pour the rest of the batter and smooth top with rubber spatula.
  9. bake for 60 minutes or until an inserted knife comes out clean.
  10.  let it cool in the pan for 20 minutes on a cooling rack.
  11.  take cake out of the pan and let it cool completely on the cooling rack. it can take up to one hour.
  12.  sprinkle some powdered sugar if desired.
  13.  store at room temperature in an airtight container for up to three days.

note: if cake browns too fast while baking, cover it with a piece of tin foil or parchment paper so the top doesn’t burn.

IMG_9724

FacebookTwitterGoogle+

Share This Post

cupcake couture blog party giveaway and chocolate cupcakes!

cupcakes are cute, right?

well, get ready because there’s a way to make them even cuter without spending a lot of time or money!

i was invited to this cupcake couture blog party organized by Java Cupcake to show how effortless it can be decorating a cupcake table. i had a blast styling the cupcakes! especially because we had to use props that were already in the house. thank god for wedding gifts :) because 80% of these props wouldn’t be here without them!

now, time for the cupcakes:

it doesn’t matter if your cupcakes are as simple as chocolate cake with swiss meringue buttercream frosting because you can add some pizzazz with cupcake wrappers from bella cupcake couture.

they’re the kind of cupcake wrappers that’ll WOW your guests at your parties and gatherings. trust me. when i showed these to my friends the first thing to come out of their mouths was: THOSE ARE AMAZING.

see? :)

IMG_9591

IMG_9494

IMG_9503

IMG_9513
IMG_9535

so cupcakes can be simple but delicious, of course you can ALWAYS make them look more glamorous with cupcake wrappers. bella cupcake couture has tons of chic and stylish designs for any occasion under the sun. weddings, birthday parties, baby showers, graduation, and so forth.

IMG_9549

IMG_9595

i haven’t told you the best news yet. there’s a giveaway.

are you doing your happy dance yet? haha.

you’ll win 240 cupcake wrappers and many more prizes.

you can make 20 times my chocolate recipe and have good looking cupcakes with that many cupcake wrappers!

IMG_9596

IMG_9575

IMG_9610

below are details on the giveaway and how to enter.

and of course i have a recipe :)

this is my all-time favorite recipe for chocolate cupcakes because they have a deep chocolate flavor, and are very fudgey but light and airy. i paired them with my favorite frosting: swiss meringue buttercream, which reminds me of ice cream. so good!

fudgey chocolate cupcakes ingredients:

1 cup all purpose flour
1/3 cup unsweetened natural cocoa powder
1/2 teaspoon sea salt
1/2 teaspoon baking powder
1/2 teaspoon baking soda
1 and 1/4 cups granulated sugar
1 extra large egg, room temperature {sitting on the kitchen counter for 30-50 minutes approximately}
1/2 cup whole milk, room temperature {sitting on the kitchen counter for 30-50 minutes approximately}
1/4 cup vegetable oil
1 teaspoon pure vanilla extract
1/2 cup boiling water
3 tablespoons strong brewed decaf coffee

yields 12 to 13 cupcakes

swiss meringue buttercream frosting ingredients:

1 and 1/4 cups granulated sugar
4 large egg whites
2 sticks unsalted butter, cold to the touch {sitting on the kitchen counter for 30-50 minutes approximately}
1 teaspoon vanilla extract
1/2 tsp sea salt

yields 12 to 13 cupcakes

directions:

  1. preheat oven to 325 degrees. line one standard size cupcake pan with grease-proof good quality cupcake liners.
  2. in a medium bowl sift flour, cocoa powder, salt, baking powder, baking soda and sugar together.
  3. in the bowl of a stand mixer beat egg, milk, oil and vanilla for 1 minute on medium-low speed {speed #4 in a kitchenaid} until combined.
  4. in a small bowl or large measuring cup combine boiling water and coffee. add in a steady form to eggs, milk and oil mixture at slow speed until well combined, about 30 seconds.
  5. set speed to the slowest setting and add flour mixture to liquids, 1/2 cup a at time until combined. do not over mix.
  6. with a standard size ice cream scoop, divide chocolate batter evenly among the cupcakes, filling them about 3/4 full.
  7. bake for 18-20 minutes, or until the tops spring back to the touch, rotating the pans half way through baking. start checking at the 18th minute mark with a toothpick.
  8. cool cupcakes in the pan on a wire rack for 5 minutes and take out of pans. let cool completely on the cooling rack before frosting, about 30 minutes.
  9. make the frosting: add water to a large pot and set on a stove burner over medium heat. you want the water to steam not to boil.
  10. in the bowl of a stand mixer, add sugar and egg whites. place bowl on top of pot with simmering water. whisk egg whites and sugar for 3 minutes, or until the sugar has dissolved and the mixture is shiny and smooth. be careful when you touch the mixture to check if the sugar has dissolved since it’s hot.
  11. transfer bowl to stand mixer and beat with the whisk attachment for 10-12 minutes, or until glossy, fluffy and soft peaks form. while egg whites are whisking, cut butter in 1/2 tablespoon pieces.
  12. once egg whites are ready, add butter, two pieces at a time beating on medium to medium-high speed. add salt and vanilla. mix until well combined. if the frosting is runny, pop it in the freezer for 10 minutes. take out of the freezer and beat at medium high speed for about one minute or until fluffy and smooth.
  13. frost cupcakes with desired tip.
  14. store in an airtight container at room temperature for up to 3 days.

i’m SO happy to be a part of this blog party and show you that it’s super easy to create a magazine-worthy cupcake set up.

…and the talented bloggers participating in this awesome giveaway are

Main Party Graphic

An American Cupcake in London

Bella Cupcake Couture

Chronicles of a Foodie

Crazy for Crust

Creative Food

Cupcakes Take the Cake

Diary of a Mad Hausfrau

Eat Your Heart Out

Haniela’s

Hoosier Homemade

In Katrina’s Kitchen

Inside BruCrew Life

Java Cupcake

Love From the Oven

Make Bake Celebrate

Not Just a Mommy

Sugar Daze

Sugar Swings! Serve Some

The Baked Equation

The Baking Cup

The Decorated Cookie

how to enter: leave me a comment below stating why you should win and “like” my facebook page. and YOU MUST fill out the entry form with this rafflecopter widget in order to enter to WIN this Prize Pack {a $565 value}. if you don’t, you won’t be considered to win.

the prize pack is open to anyone in the U.S. and Europe. a winner will be chosen Tuesday, May 28, 2013 and announced within 24 hours of the contest ending. winner will be contacted via email to claim their prize.

Prize Pack Graphic

thanks to our amazing Prize Pack sponsors for their generous donations! Please, visit their websites to see more of their fabulous products!

Bella Cupcake Couture

Cupcake Stand

Java Cupcake

Lil’ Punkin Creations

Sweets & Treats Boutique

best ever peanut butter marshmallow brownies

do you know who’s best friends with peanut butter? if you said honey, you aren’t wrong :) who doesn’t like eating a peanut butter honey sandwich? ok, maybe just me.

if you said chocolate, you were right. chocolate is peanut butter’s best friend. but, i think chocolate goes beyond friendship and is peanut butter’s spouse. they go SO well together and are perfect for each other :)

this recipe yields a rather thin brownie because of the size of the pan i used. i tested this recipe twice and is definitely better with the larger size pan due to the brownies’ richness, texture, and the addition of marshmallow creme and peanut butter. they are the perfect balance of sweetness because of the chocolate and marshmallow and saltiness because of the peanut butter. they are chewy and melt in your mouth. and if you are looking for the perfect peanut butter brownies, this is it!

i documented these amazing brownies and hope you make them. they will love you forever :)

make the peanut butter mixture with the double boiler technique. add butter, milk, peanut butter, powder sugar and marshmallow creme to a bowl and stir occasionally until smooth!!

IMG_9115

IMG_9129

now onto the brownies :) this is a pretty easy and to the point method. over simmering water {double boiler technique} melt chocolate with butter, coffee and cocoa powder.

IMG_9120

IMG_9121

add sugars immediately after taking bowl off of the stove.

IMG_9123

whisk in eggs and fold in flour. and you are almost done :)

IMG_9125

add peanut butter mixture followed by the marshmallow creme. there’s no right or wrong here. i added it in a line shape and filled the gaps with the marshmallow.

IMG_9130

IMG_9131

with a butter knife swirl the peanut butter and marshmallow in both directions, horizontally and vertically.

IMG_9134

can’t wait to dig in!!

IMG_9136

IMG_9139

IMG_9141

IMG_9150

IMG_9151

IMG_9160

IMG_9109

IMG_9154

IMG_9166

IMG_9170

IMG_9181

IMG_9185

IMG_9186

IMG_9190

best ever peanut butter marshmallow brownies

ingredients:
1 stick unsalted butter
3 and 1/2 ounces unsweetened chocolate, chopped
2 teaspoons unsweetened cocoa powder
2 tablespoons strong brewed decaf coffee {regular coffee works too}
1/2 cup dark brown sugar, packed
1 and 3/4 cups granulated sugar
2 teaspoons vanilla extract
3 large eggs, room temperature {sitting on the kitchen counter for 30-50 minutes approximately}
1/8 teaspoon sea salt
3/4 cup all purpose flour
6.5 ounces marshmallow creme {half of a 13 ounce jar approximately}

peanut butter-marshmallow creme swirl

ingredients:
One 16 ounce jar creamy peanut butter {i used all natural}
4 tablespoons unsalted butter
1 cup whole milk, room temperature {sitting on the kitchen counter for 30-50 minutes approximately}
1 teaspoon vanilla extract
6.5 ounces marshmallow creme {half of a 13 ounce jar approximately}
1/2 cup powder sugar

yields 32 2×2 inch squares.

directions:

  1. preheat oven to 350F.
  2. grease a 17.25 x 11.5 inch shallow baking pan {cookie sheet} throughout with butter and line with parchment paper. grease parchment paper with butter. parchment paper should hang over the edges of the pan. set aside.
  3. in a large {heat-proof} glass bowl over a pot of simmering, slightly boiling water over medium low heat, combine peanut butter, vanilla, marshmallow creme, butter, powder sugar and milk.
  4. mix constantly with a rubber spatula until all ingredients are well combined. peanut butter mixture is ready when smooth. turn heat to low and leave bowl on top of the pot with simmering water.
  5. in a large {heat-proof} glass bowl over a pot of simmering, slightly boiling water over medium low heat, melt unsweetened chocolate with butter, coffee and cocoa powder keeping an aye on it by stirring with a whisk constantly. this will avoid the chocolate to scorch.
  6. once chocolate mixture is melted, take bowl off of pot with simmering water with pot holders and place on a heat-proof surface such as a large trivet or cutting board. immediately add sugars and whisk by hand for one minute until dissolved. do not over mix since you don’t want the brownies to be caky once baked.
  7. whisk in vanilla and eggs, one at a time, mixing well after each one.
  8. add sea salt and mix well until incorporated.
  9. mix in flour just until incorporated. do not over mix.
  10.  add brownie batter to pan. add peanut butter-marshmallow creme swirl mixture to brownie batter in dollops forming 3 parallel lines.
  11. add marshmallow creme in dollops and use a knife to swirl brownie batter, peanut butter mixture and marshmallow creme together in both vertical and horizontal directions.
  12.  bake for 25-30 minutes. they are ready when a toothpick comes out with a few crumbs. start checking brownies at the 25th minute mark.
  13.  cool on a wire rack for at least 2 hours before cutting. or you can cool brownies in the fridge for at least 1 hour before cutting. with a pizza cutter or sharp knife cut into 2-inch squares.
  14.  store at room temperature in an airtight container for up to 3 days.

Notes:
I used this wilton pan for the brownies. You can certainly bake these brownies in a smaller pan but make sure to increase the baking time by 10 minutes or so because they will be thicker, so you’ll need to bake them longer.

IMG_9188

salsalicious

i had the urge to post this salsa recipe for you to enjoy on cinco de mayo.

or if you are like me, you can enjoy this easy-to-make, lime-bursting salsa every week. yes, i make it pretty much on a weekly basis. it’s so delicious and healthy. it must be my love for tomatoes and cilantro. this salsa has layer after layer of flavors and it is salsalicious.

chop everything separately in a food processor or blender, or by hand. mix ingredients in a bowl. season with lime and sea salt. and you are on your way to a mind blowing, yet simple mexican salsa.

i LOVE lime. i grew up in south america, and lime is actually our lemon. so i overuse it in this recipe. but, there’s no such thing. try it and you’ll see that this salsa has the most balanced lime ratio than most of them out there. at least i like justifying my love for lime and how good it tastes in this salsa :)

you can check out my guacamole recipe here. my husband asked me to tell you that he highly recommends it ;)

here’s the how-to and recipe. enjoy!

finely chop onions and jalapeño.

IMG_5817

proceed to chop tomatoes in a food processor or with a knife.

IMG_5822

add the tomatoes to onions and jalapeño.

IMG_5828

salsa is nothing without the lime. it definitely enhances all the layers in this appetizer.

IMG_5832

i barely chop the cilantro as you can see :)

IMG_5845

serve with chips or with mexican dishes!

IMG_9361

IMG_9362

IMG_9381

IMG_9389

IMG_9391

IMG_9399

IMG_9402

IMG_9406

salsalicious {salsa}

ingredients:

3 ripe plum tomatoes, or any other kind
1/2 jalapeño pepper, finely chopped {more or less, depending how spicy you like it}
1/2 small red onion, finely chopped
1/2 bush cilantro, roughly chopped
2 limes, juiced {more if needed}
sea salt to taste {i add about 1/2 teaspoon}

serves 8 people.

directions:

  1. cube tomatoes and add to food processor. pulse several times until you get small chunks but also some liquid from the tomatoes.
  2. if you like your salsa pico de gallo style, pulse about 3 to 5 times. You can also chop the tomatoes with a knife in small cubes.
  3. in a medium bowl, add chopped tomatoes, cilantro, onions, jalapeño, lime and sea salt. stir all ingredients. taste and add more lime or salt if needed.
  4. serve with chips, pita chips, Mexican dishes and more.
  5. refrigerate in an airtight container for up to three days.

IMG_9413

scrumptious red velvet cupcakes

Follow by blog with bloglovin: http://www.bloglovin.com/blog/4746913/?claim=p6vd5mu4ett

hi, my name is carolina and i’m addicted to red velvet cupcakes. my addiction began many years ago and is still going strong ;)

okay, now that i have confessed, i can tell you all about these red velvet cupcakes. the cupcakes are light, fluffy and like my friend Paula {hi Paula!} would say “very red velvety.”

they don’t have too much cocoa powder so it doesn’t overpower their taste. we are talking about having the perfect sweet/tanginess ratio here. SERIOUSLY.

speaking of which, i developed this recipe with the intention of including greek yogurt. so it has a good half a cup of the non-fat kind. in addition we have the baking soda with the vinegar, adding the ultimate tang to the batter. a.m.a.z.i.n.g.

cake flour was also a major player in the small, light crumb of this cupcake texture. my favorite. because in my opinion, cupcakes should be light and airy, but flavorful. i’m not friends with dense, hard texture cupcakes. nope, can’t do it.

haha. watch out, apparently i take cupcakes’ texture very seriously.

let’s talk frosting {which by the way i take even more seriously than cupcakes’ texture}.

i paired the red velvet cupcakes with my good ol’ cream cheese frosting i developed years ago. if you like sugary frosting, where you can only taste sugar and more sugar, i think you need to try this recipe so the sugary frosting demons can leave your taste buds :) haha.

like you’ll see below, the cream cheese frosting is creamy, light, very tangy with a hint of sweetness from the powder sugar. very easy to make and it only has 4 ingredients.

enjoy my directions in pictures {i do my best to guide you through the recipe!} and how these adorable but scrumptious red velvet cupcakes look like after baked.

sift flour with cocoa powder, add sea salt and whisk well!

IMG_8969

IMG_8970

IMG_8972

add sugar to oil and beat in the bowl until creamy.

IMG_8973

proceed to add eggs beating well after each addition.

IMG_8975

this is the red gel paste i used. you can certainly use beet juice if you like!

IMG_8977

alternate flour, milk/greek yogurt mixtures.

IMG_8979

IMG_8981

this is one of my favorite parts. making the baking soda bubble with the vinegar makes me feel like a scientist ;)

IMG_8984

scoop batter into lined cups

IMG_8986

onto the frosting! cream butter and add the cream cheese.

IMG_8993

mmm!

IMG_9003

add sprinkles!

IMG_9012

IMG_9032

IMG_9037

IMG_9068

IMG_9075

scrumptious red velvet cupcakes

ingredients:
2  and 1/4 cups cake flour
1 and 1/2 tbsps unsweetened cocoa powder
1/2 tsp sea salt
1 cup vegetable or canola oil
1 and 1/2 cups sugar
2 large eggs, room temperature {about 30 to 45 minutes sitting on the kitchen counter}
2 tsps vanilla extract
1 tsp red gel paste food coloring
1/2 cup whole milk, room temperature {about 30 to 45 minutes sitting on the kitchen counter}
1/2 cup nonfat plain greek yogurt, room temperature {about 30 to 45 minutes sitting on the kitchen counter}
2 tsps baking soda
2 tsps white vinegar

yields 20 cupcakes

directions:

  1. preheat oven to 350F. line two standard cupcake pans with good quality {grease-proof preferably} paper liners {12 and 8 cupcakes in total}.
  2. combine milk and greek yogurt in a small bowl or large measuring cup and whisk well eliminating any lumps. set aside.
  3. in a large bowl, sift flour and cocoa powder. whisk in sea salt. set aside.
  4. in a bowl of a stand mixer fitted with the paddle attachment, beat oil and sugar for 2 minutes at medium speed {speed #5 on kitchenaid}. sugar and oil should be well combined and have a creamy consistency.
  5. add one egg at a time, mixing well after each addition.
  6. follow with vanilla and food coloring at medium speed.
  7. alternate milk mixture with flour mixture three times at the lowest speed setting. make sure to finish with the milk.
  8. stop mixer and in a small bowl combine baking soda and vinegar mixing well with a fork. it will foam and you’d want to add it to the batter immediately. beat on medium high for 30 seconds until well combined.
  9. with an ice cream scoop, pour batter into cupcake liners filling 3/4 full.
  10.  bake for 18 minutes rotating cupcakes half way through.
  11.  cool cupcakes on a wire rack for 3 minutes. let them cool out of the pan completely before frosting.
  12.  store in an airtight container at room temperature for up to 2 days.

cream cheese frosting

ingredients:

  1. 12 tbsps unsalted butter, cubed, room temperature but still cold {about 45 minutes sitting on the kitchen counter and cold to the touch}
  2. 12 oz package cream cheese, cubed, room temperature but still cold {about 45 minutes sitting on the kitchen counter and cold to the touch}
  3. 2 tsps vanilla extract
  4. 1 1/2 cups powder sugar
  5. sprinkles for garnish {optional}

directions:

  1. beat butter for 3 minutes in the bowl of a stand mixer fitted with the whisk attachment at medium speed {setting #5 in a kitchenaid}.
  2. add cream cheese to bowl and beat at medium speed for 1 1/2 to 2 minutes until well combined and fluffy.
  3. add vanilla extract and beat for 30 seconds. stop the mixer to scrape the sides and bottom of the bowl and mix on high for 30 more seconds to combine all the ingredients.
  4. set mixer to the lowest setting and add powder sugar a little at a time. once all the sugar is incorporated, about 30 seconds, mix on high for 1 and 1/2 minutes to make the frosting creamy, fluffy and airy.
  5. in a piping bag fitted with desired tip, add the frosting to decorate the cupcakes.

IMG_9075